Now that you have installed The Courier Guy plugin to your website, you will need to connect your account. This includes adding The Courier Guy as a shipping method.
Screenshots
Video Transcript
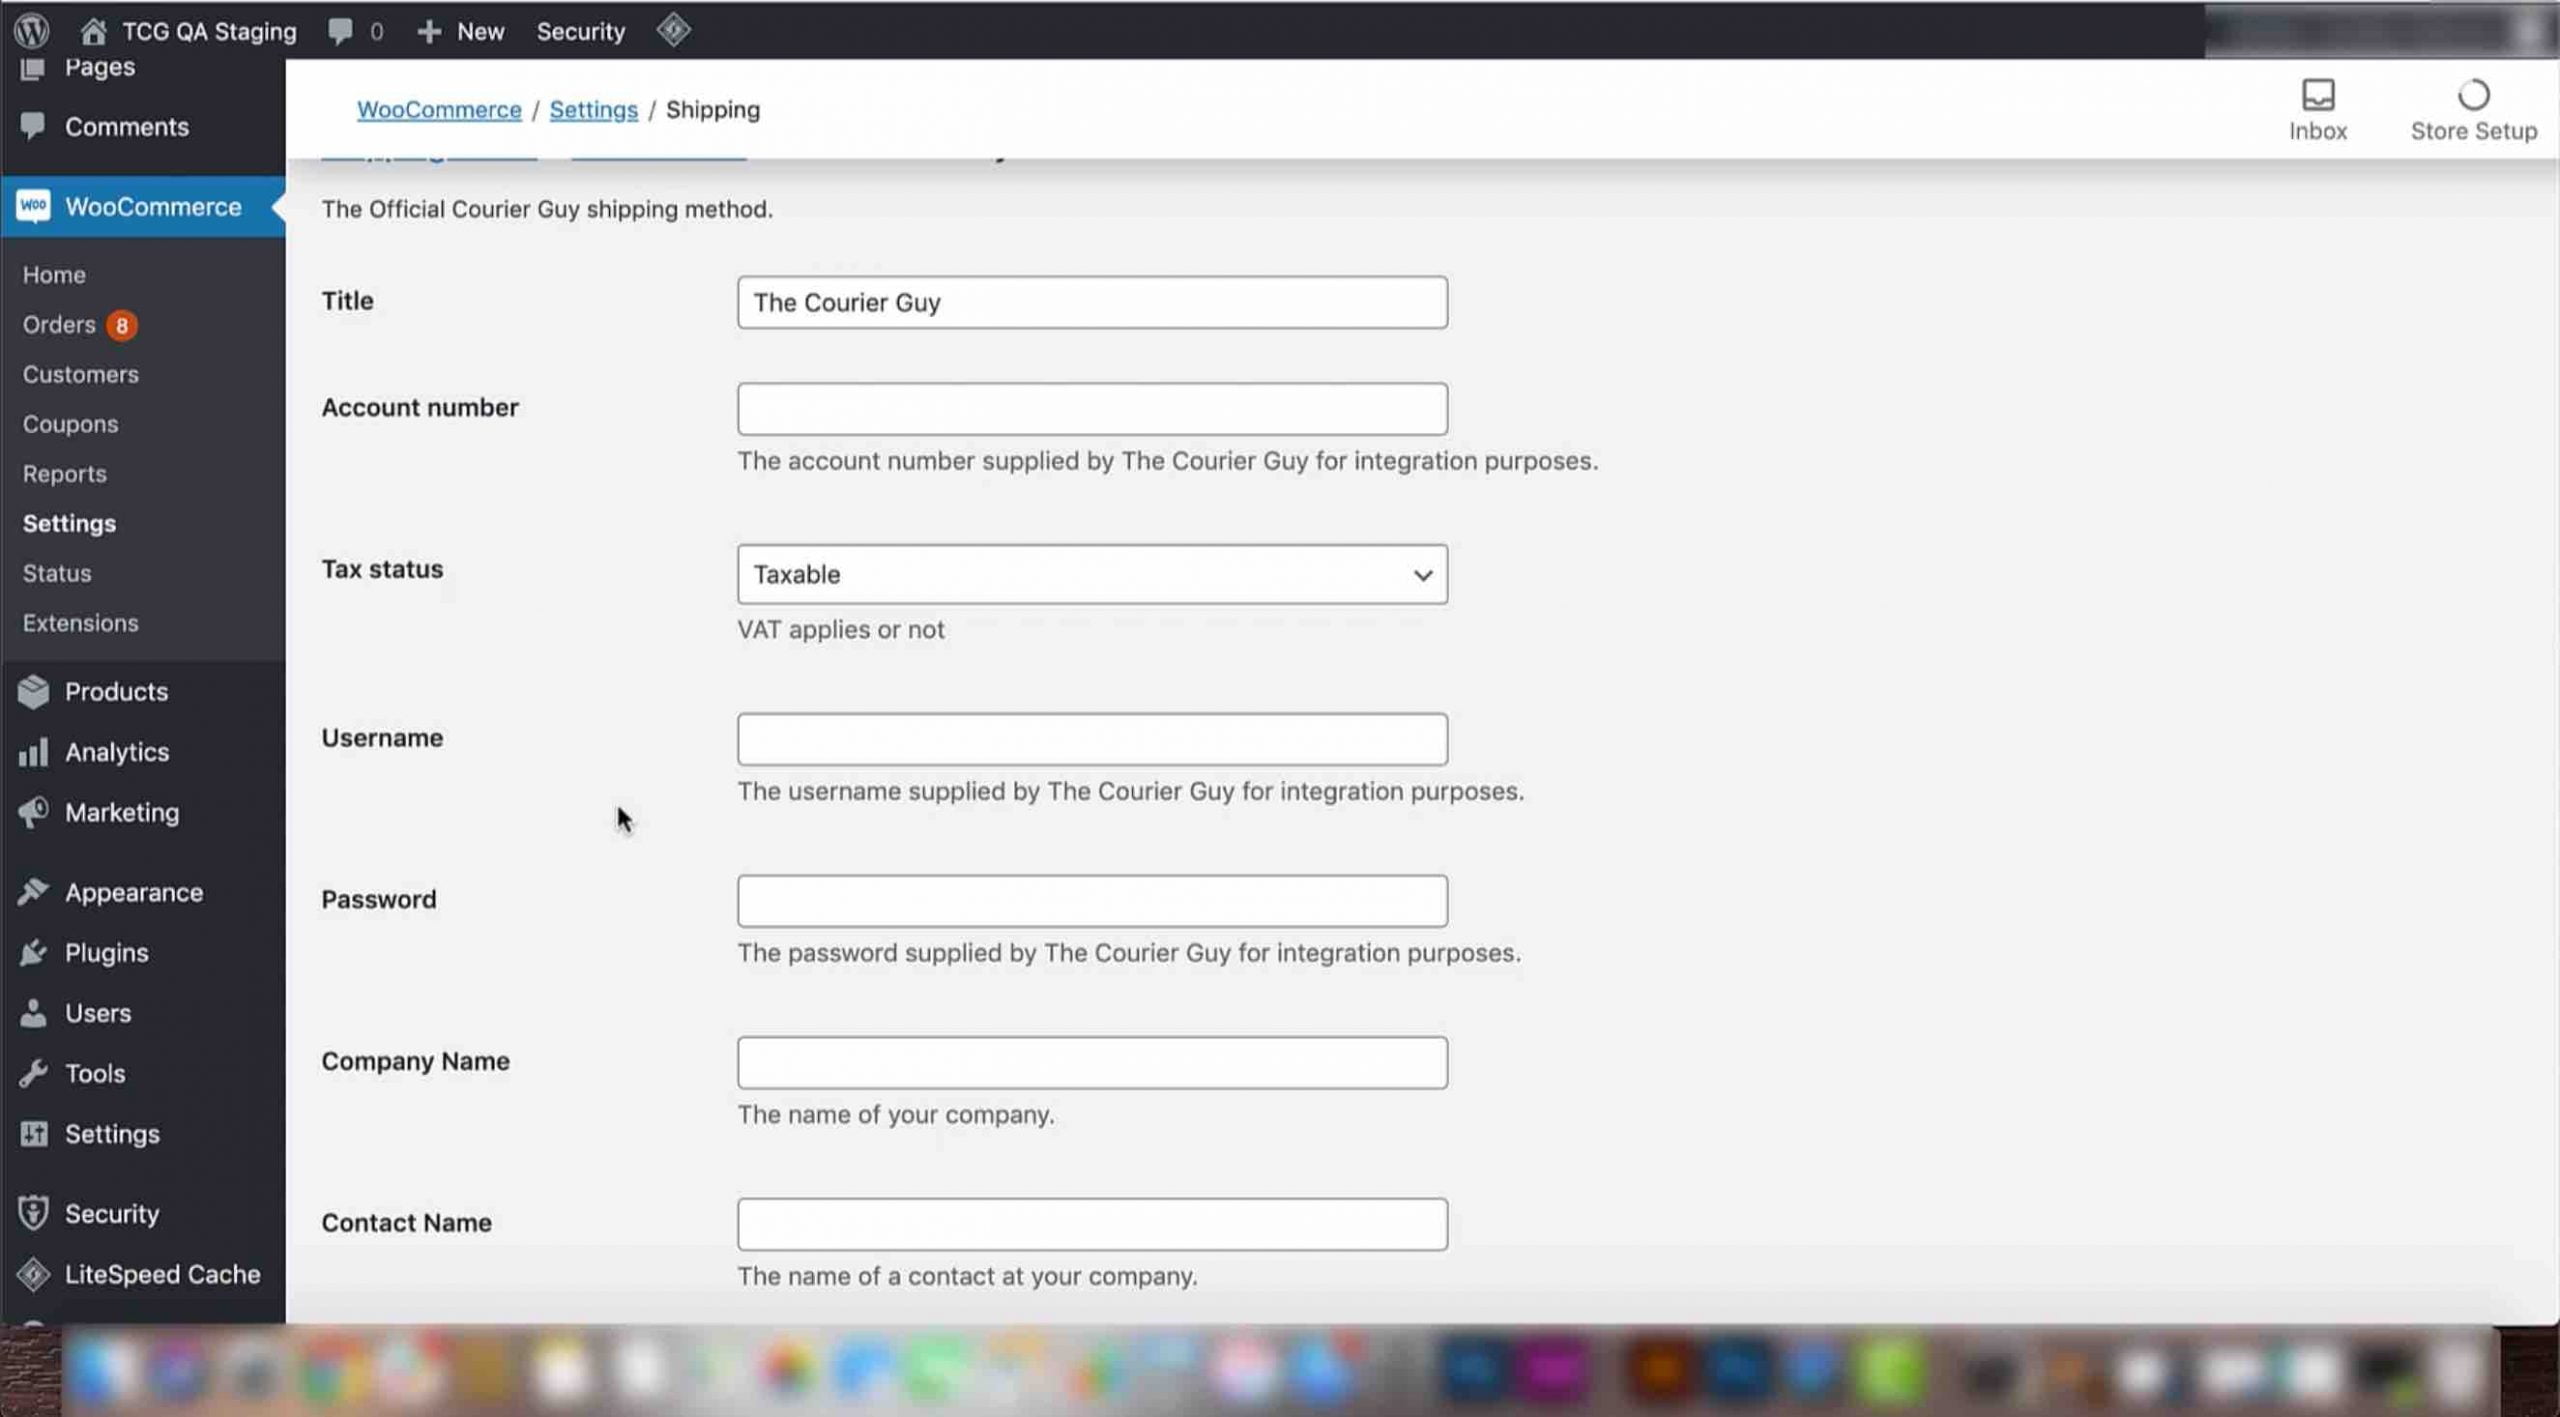
To do this, you will need to add details such as your account number, username, password and shop area or suburb. In this video we will show you how to go about doing this and where to find these settings.
Connecting your Courier Guy account to a website Instructions:
1) Now that you have activated your plugin, you can begin configuring and connecting it to your website.
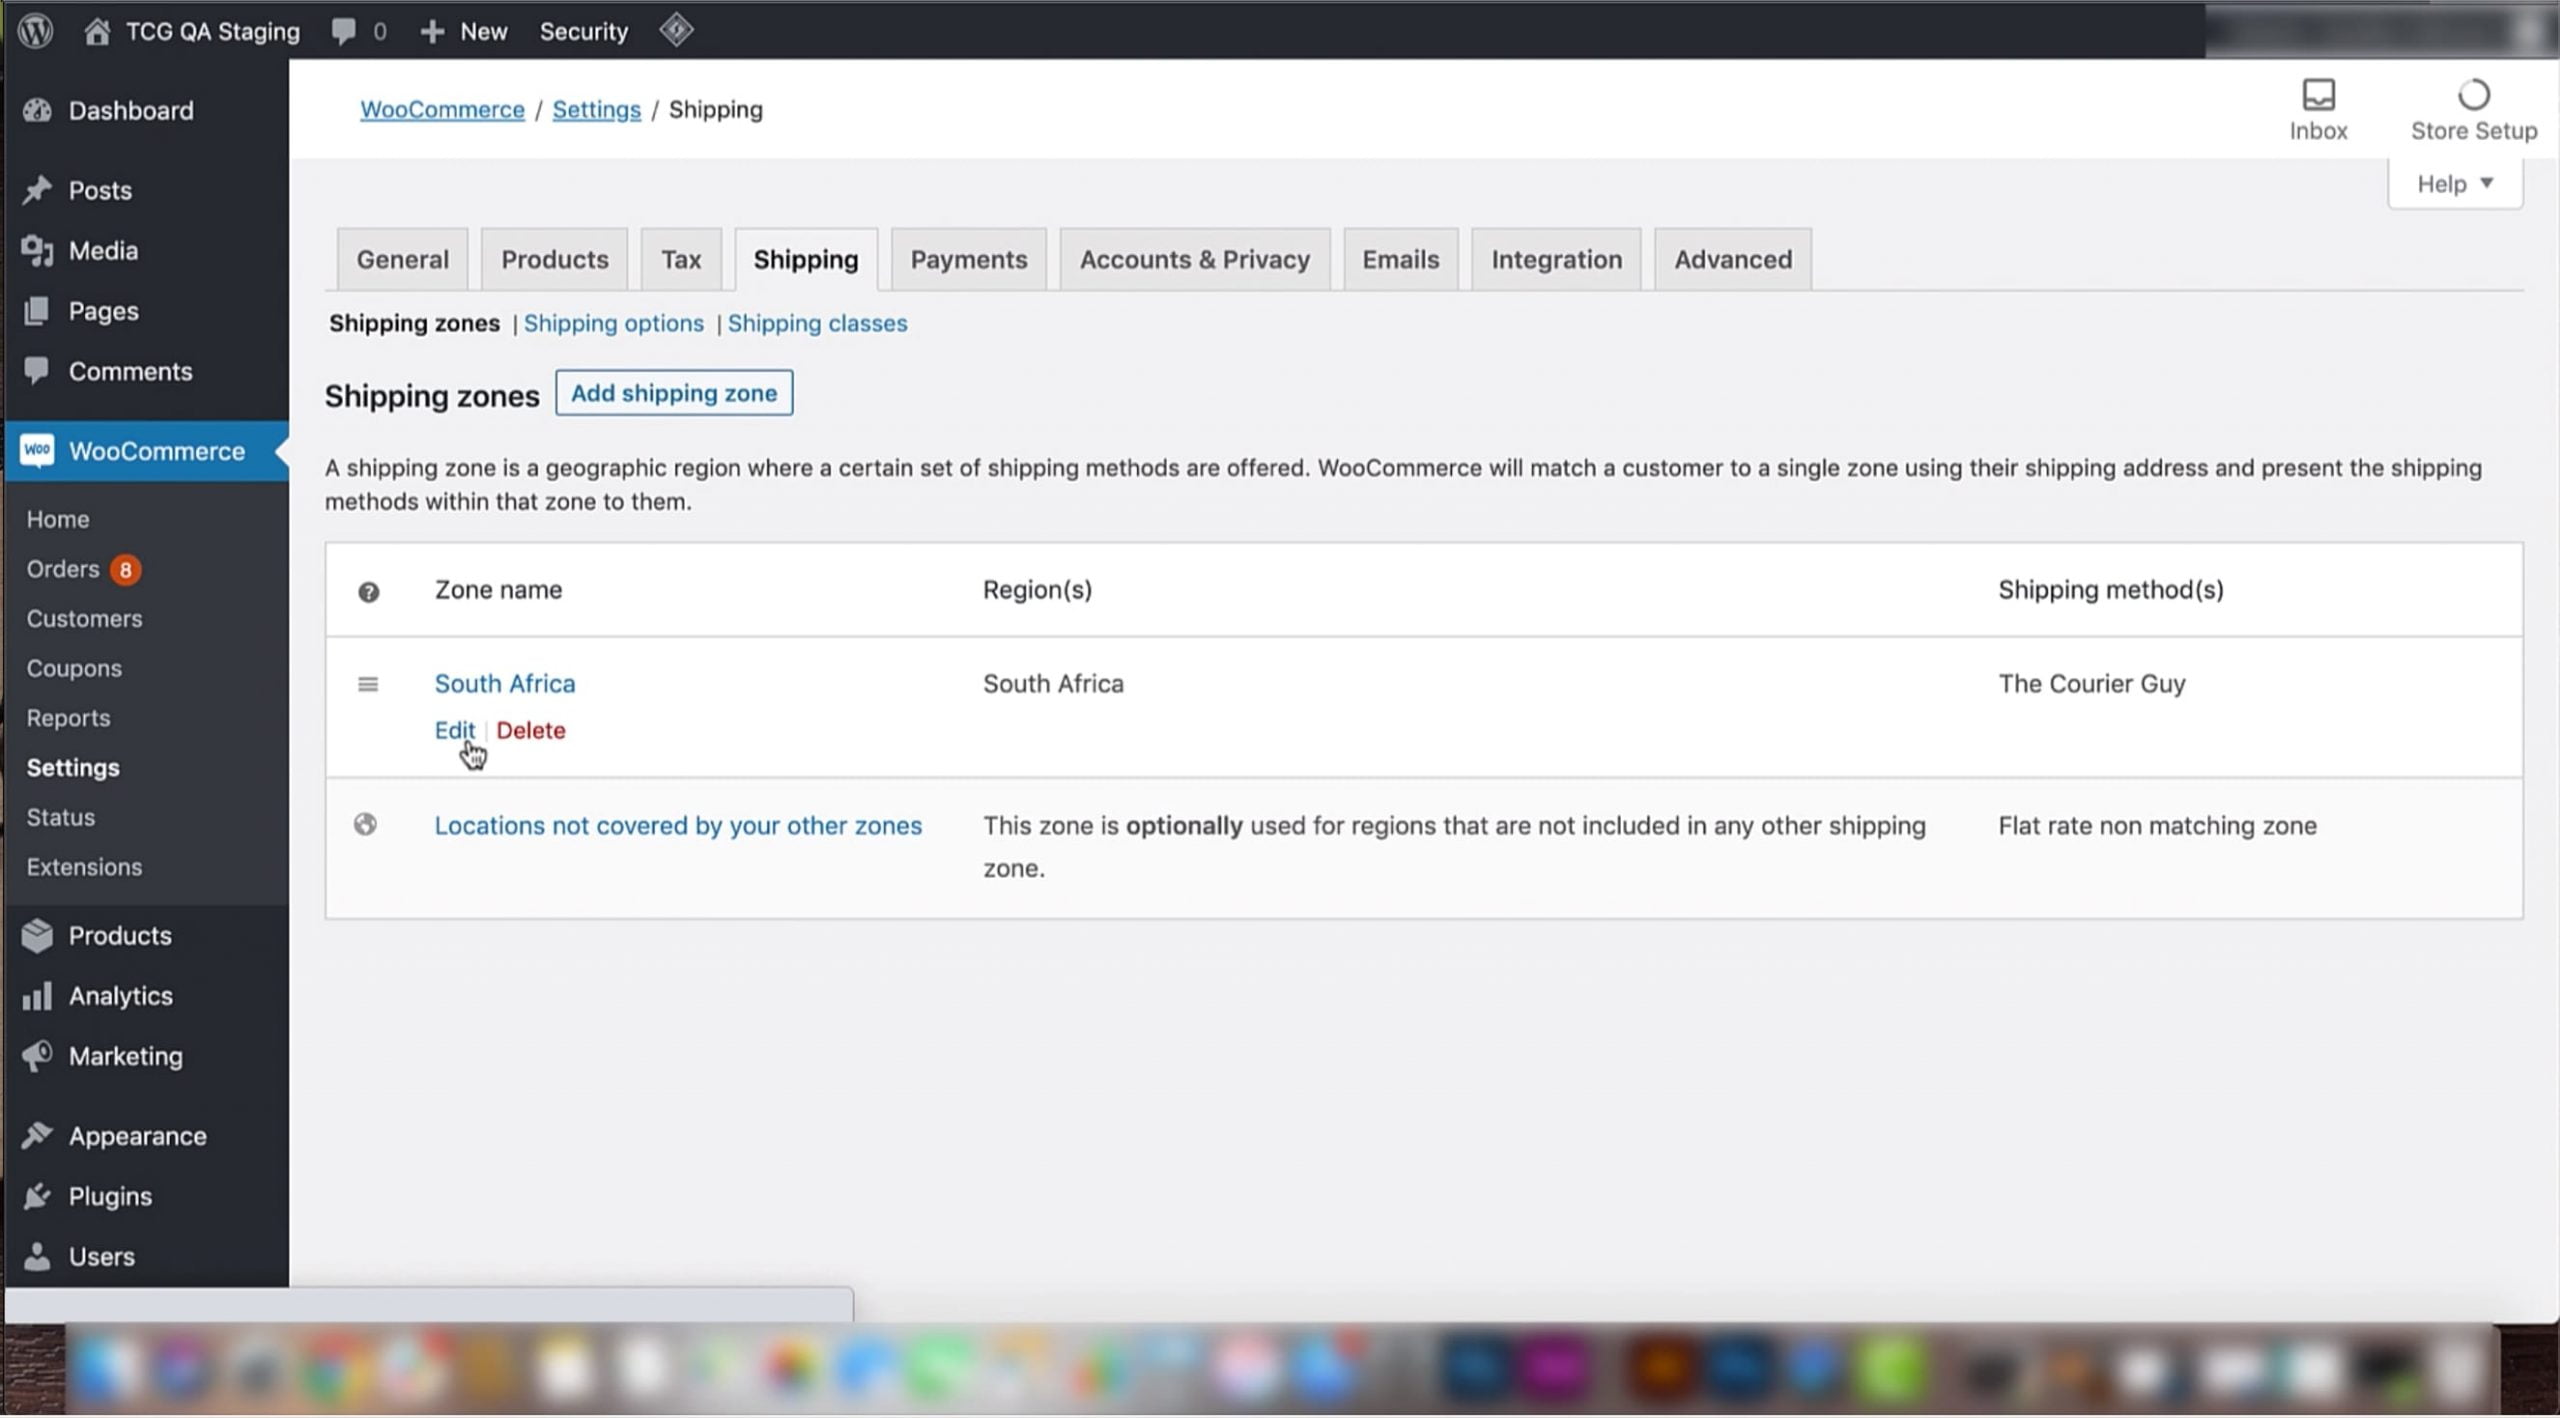
2) Hover over the ‘WooCommerce’ option in the bar on the left of your screen, then select the ‘Settings’ option that appears next to it.
3) Next, click on the ‘Shipping’ tab that appears at the top of the screen.
4) Find your shipping zone under the ‘Zone name’ section, for example, South Africa. Hover over it and click on the ‘edit’ option.
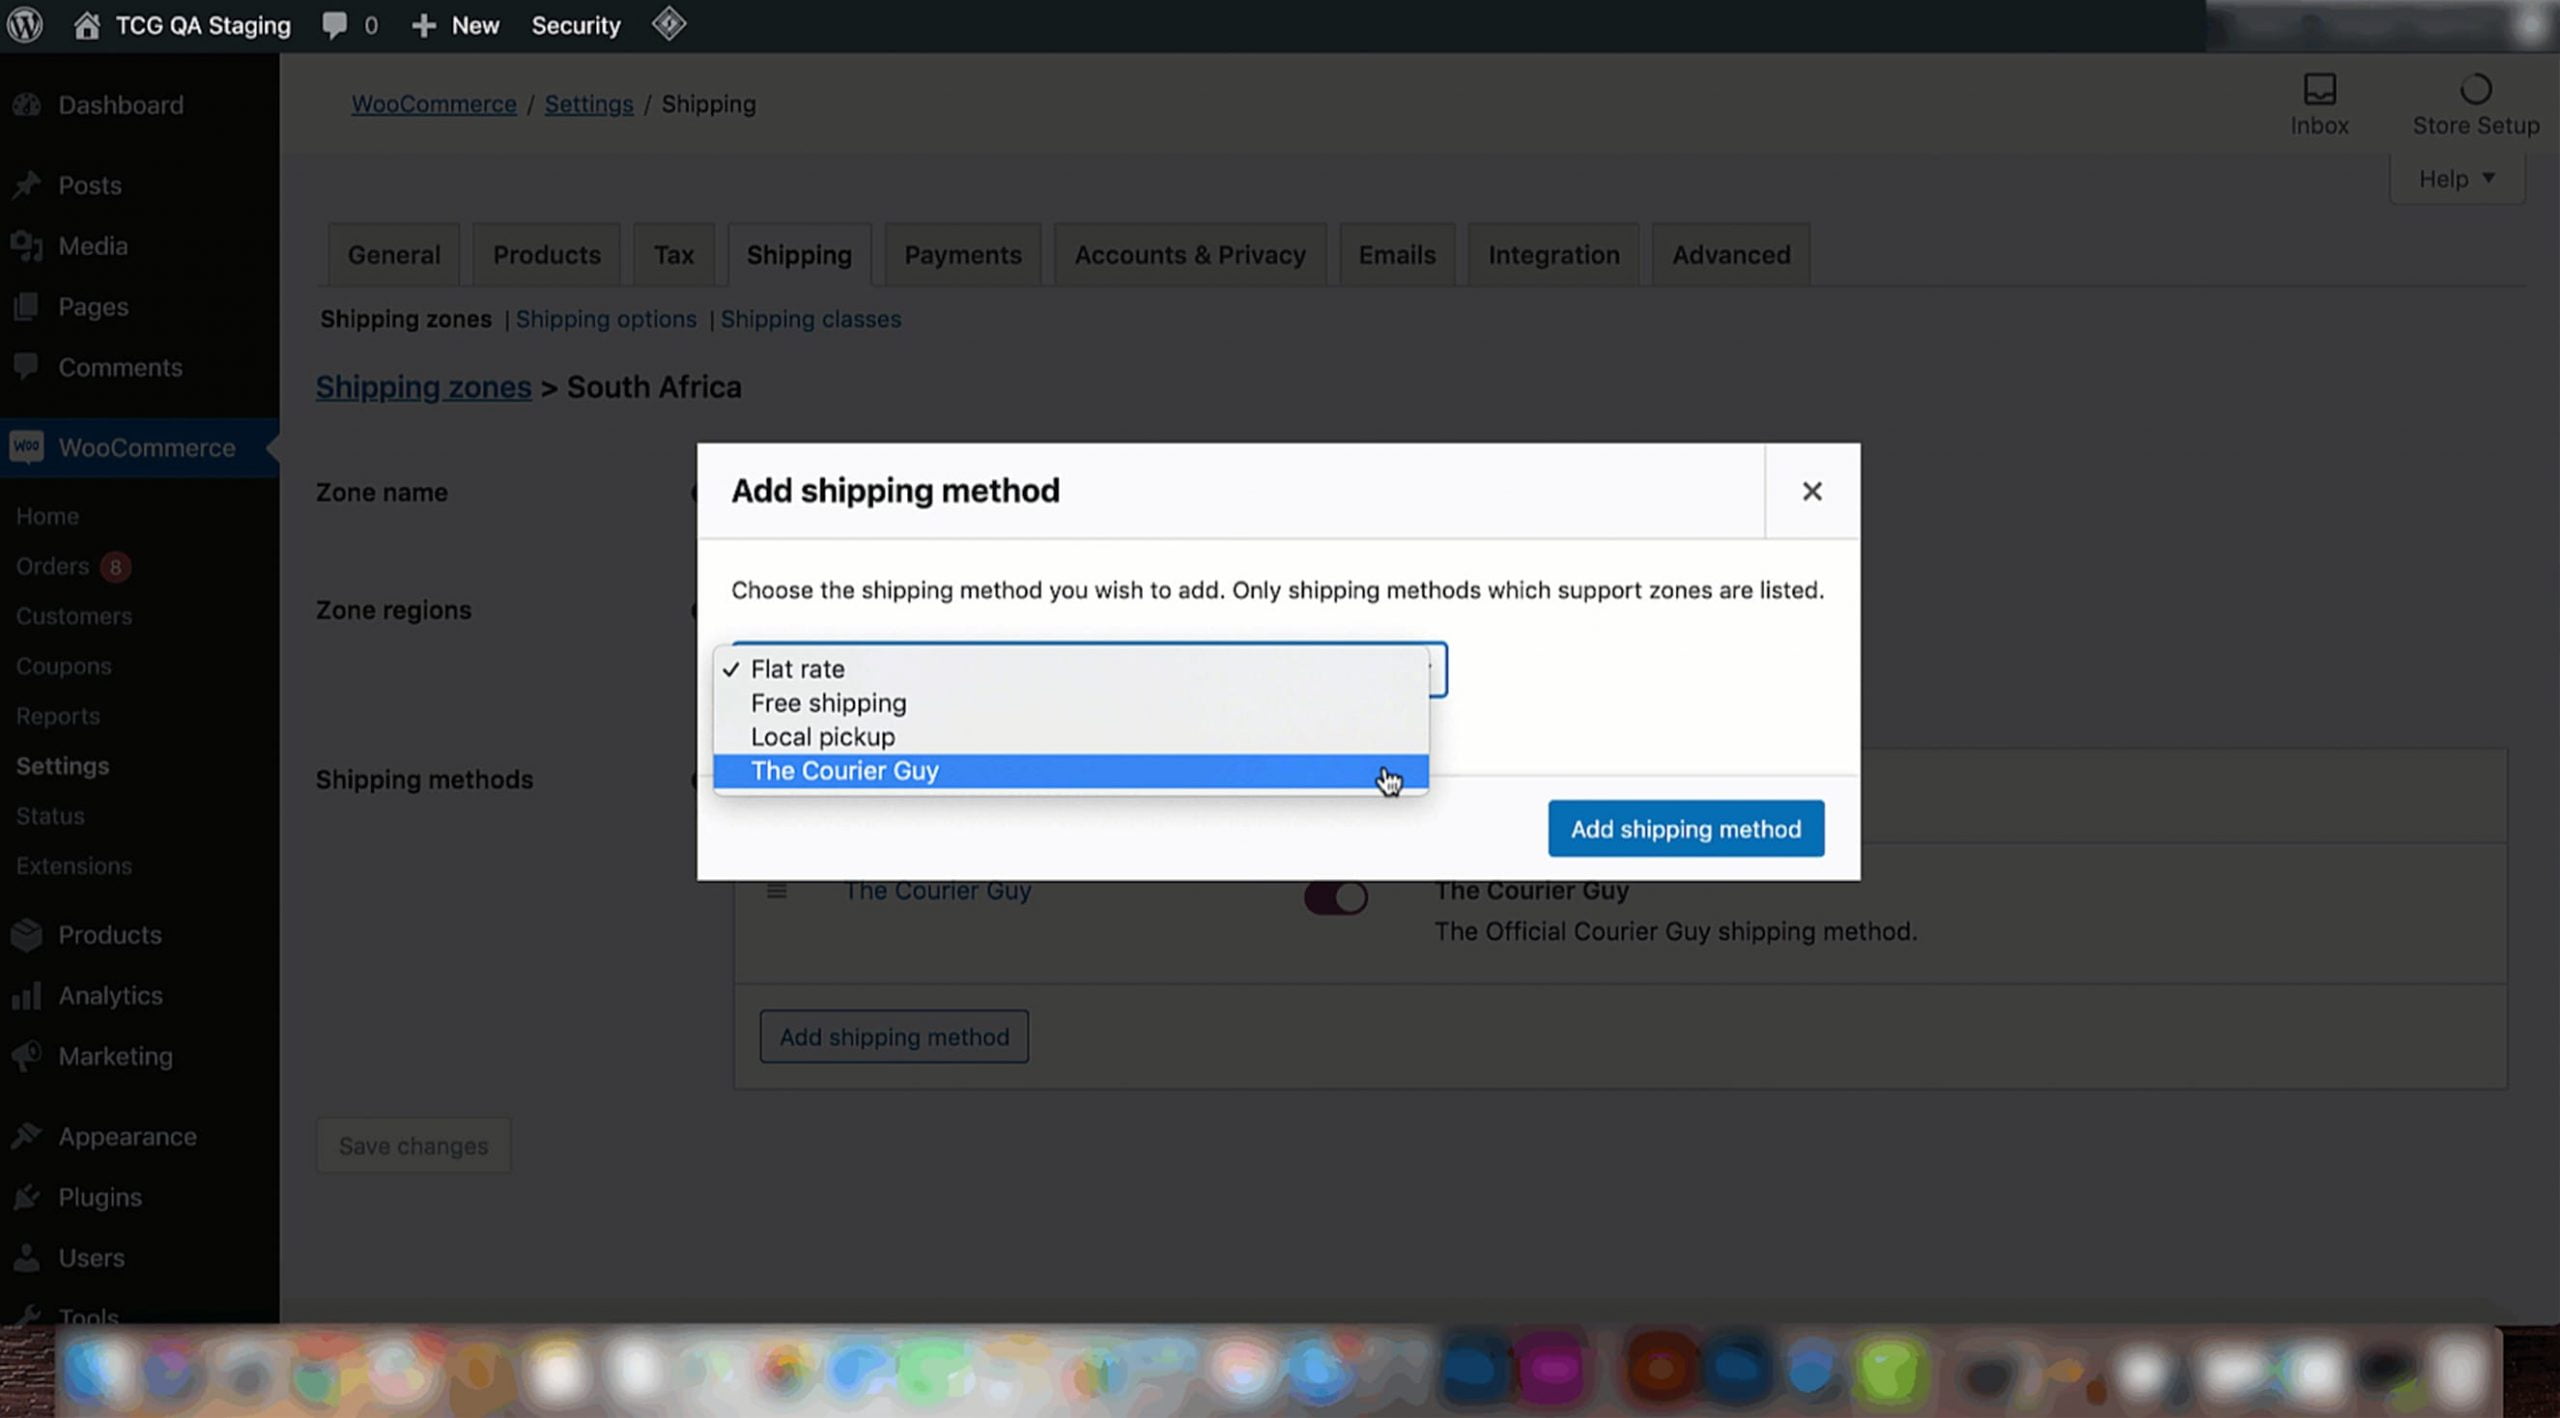
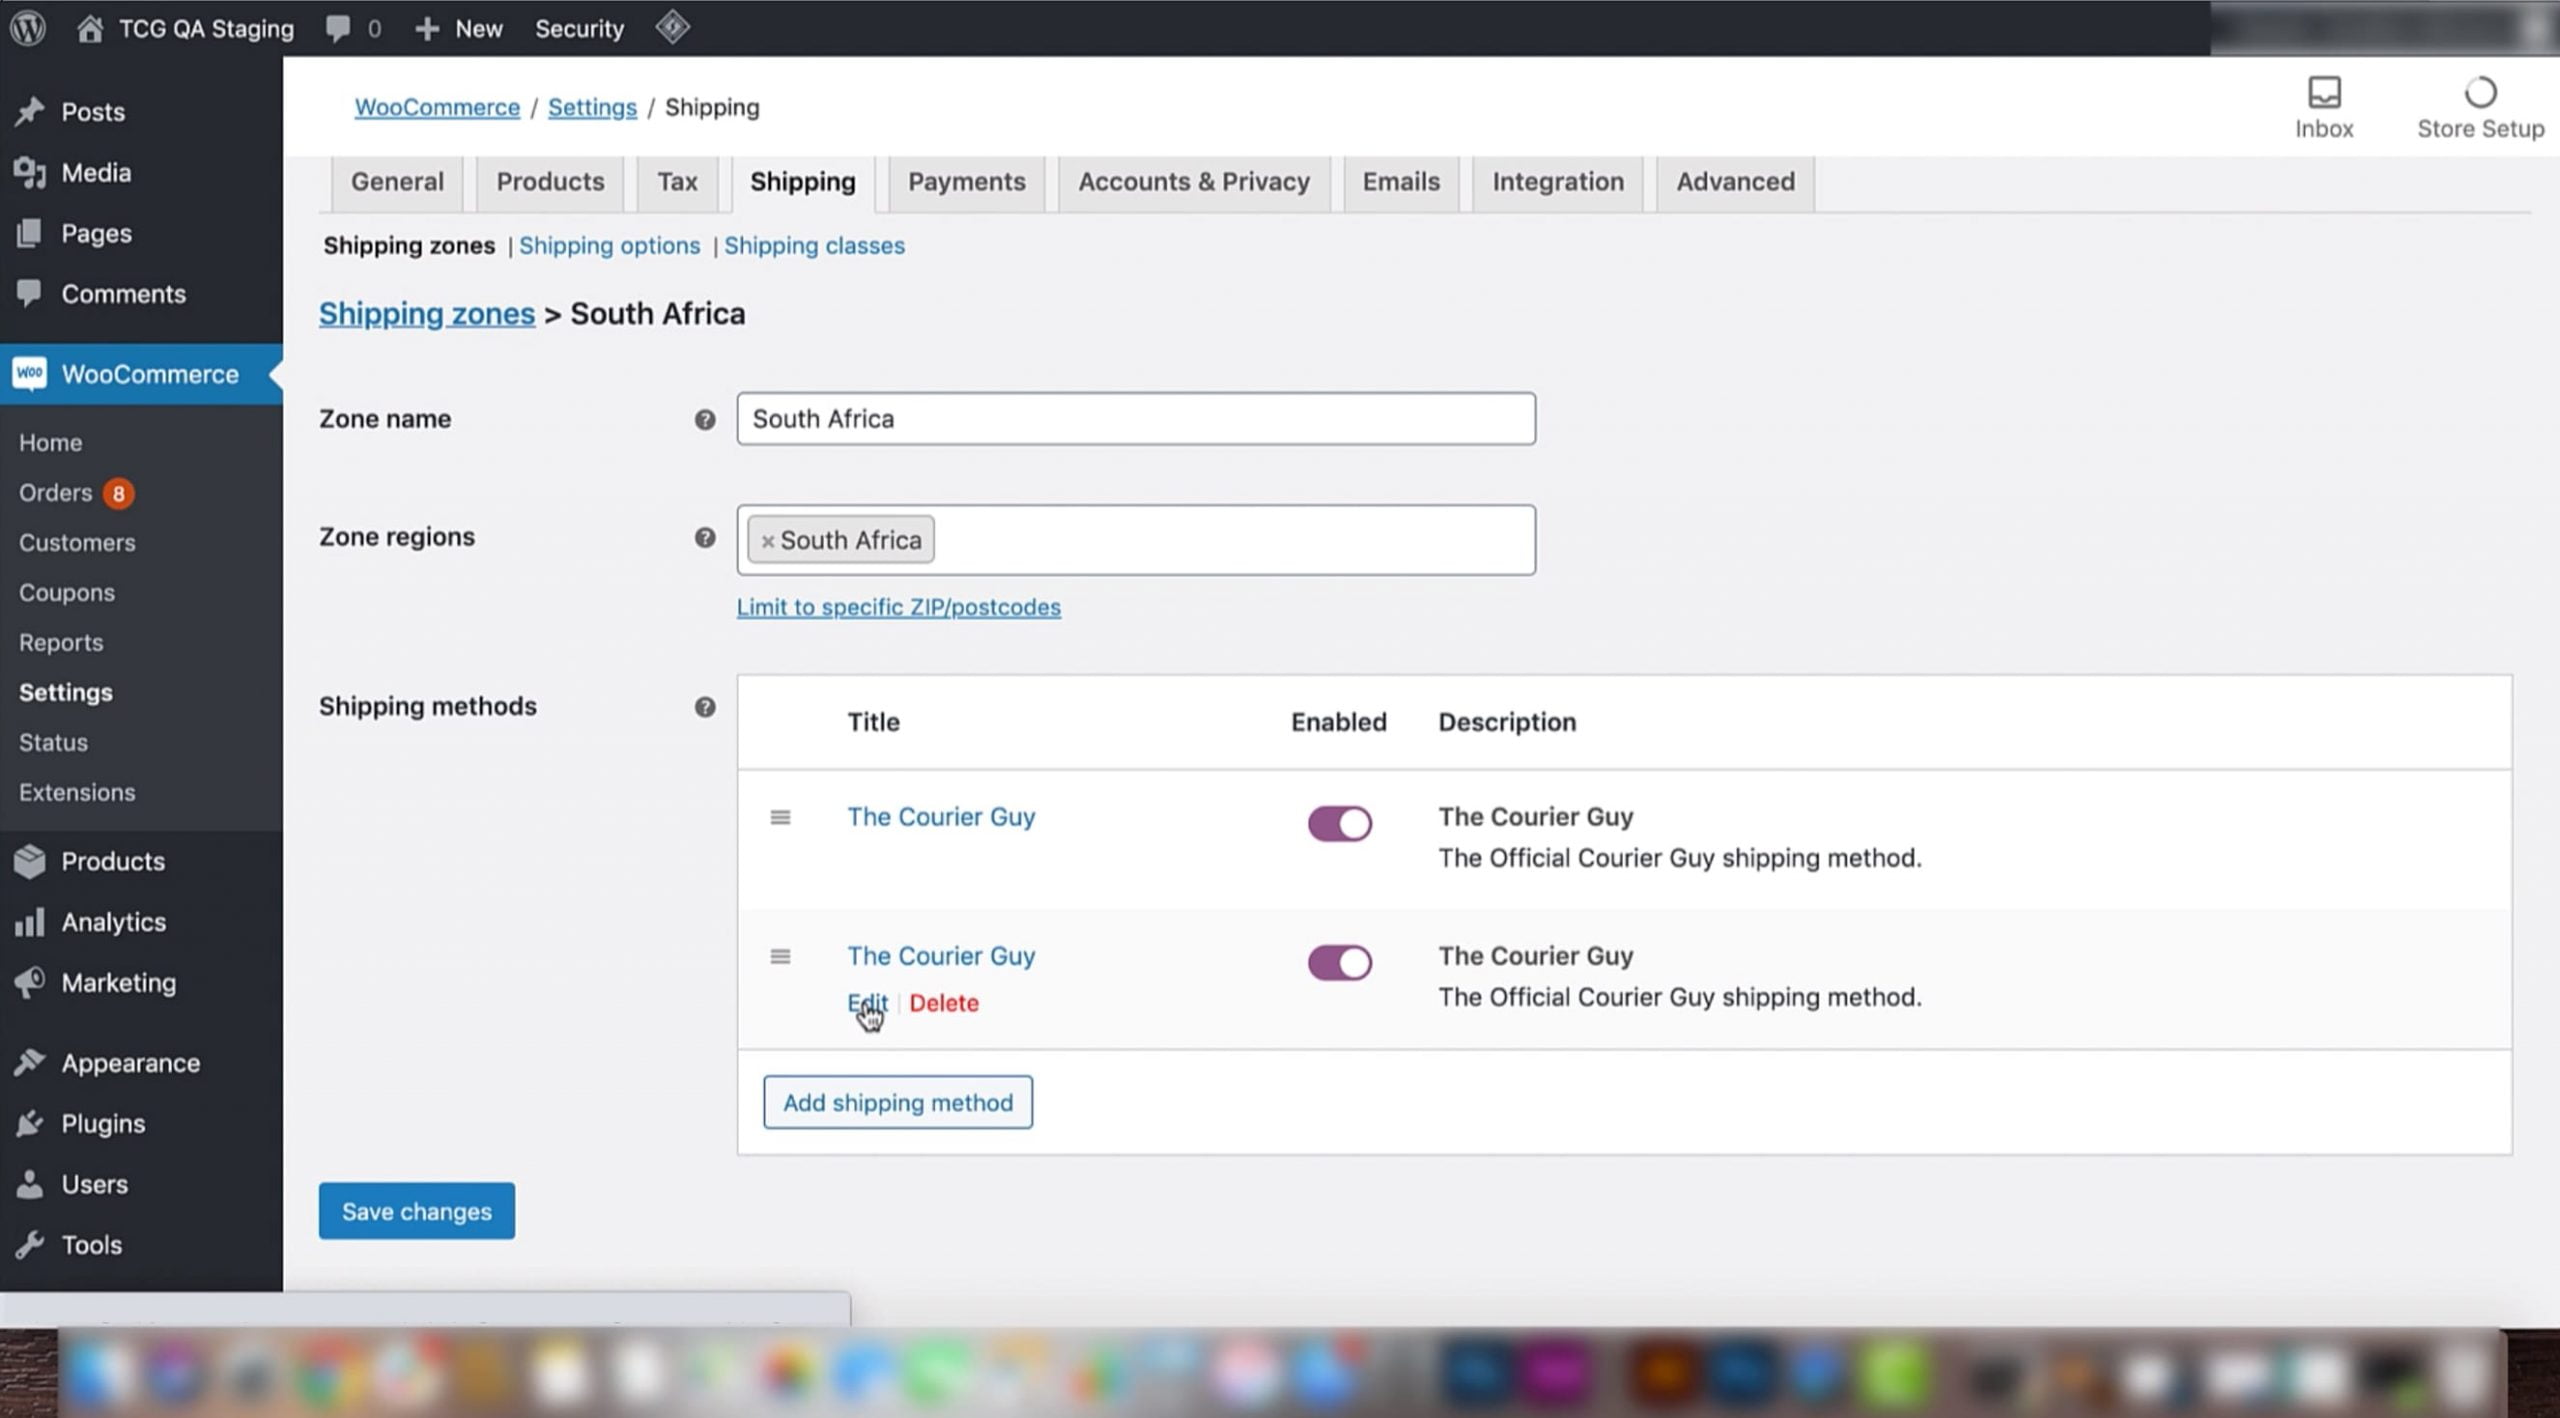
5) Scroll down to the ‘Shipping methods’ section and click on the ‘Add shipping method’ button. Click on the arrow on the pop up that appears and select ‘The Courier Guy’ in the drop down. Once it has been selected, click on the ‘Add shipping method’ button.
6) Find your newly added shipping method, hover over it and select ‘edit’.
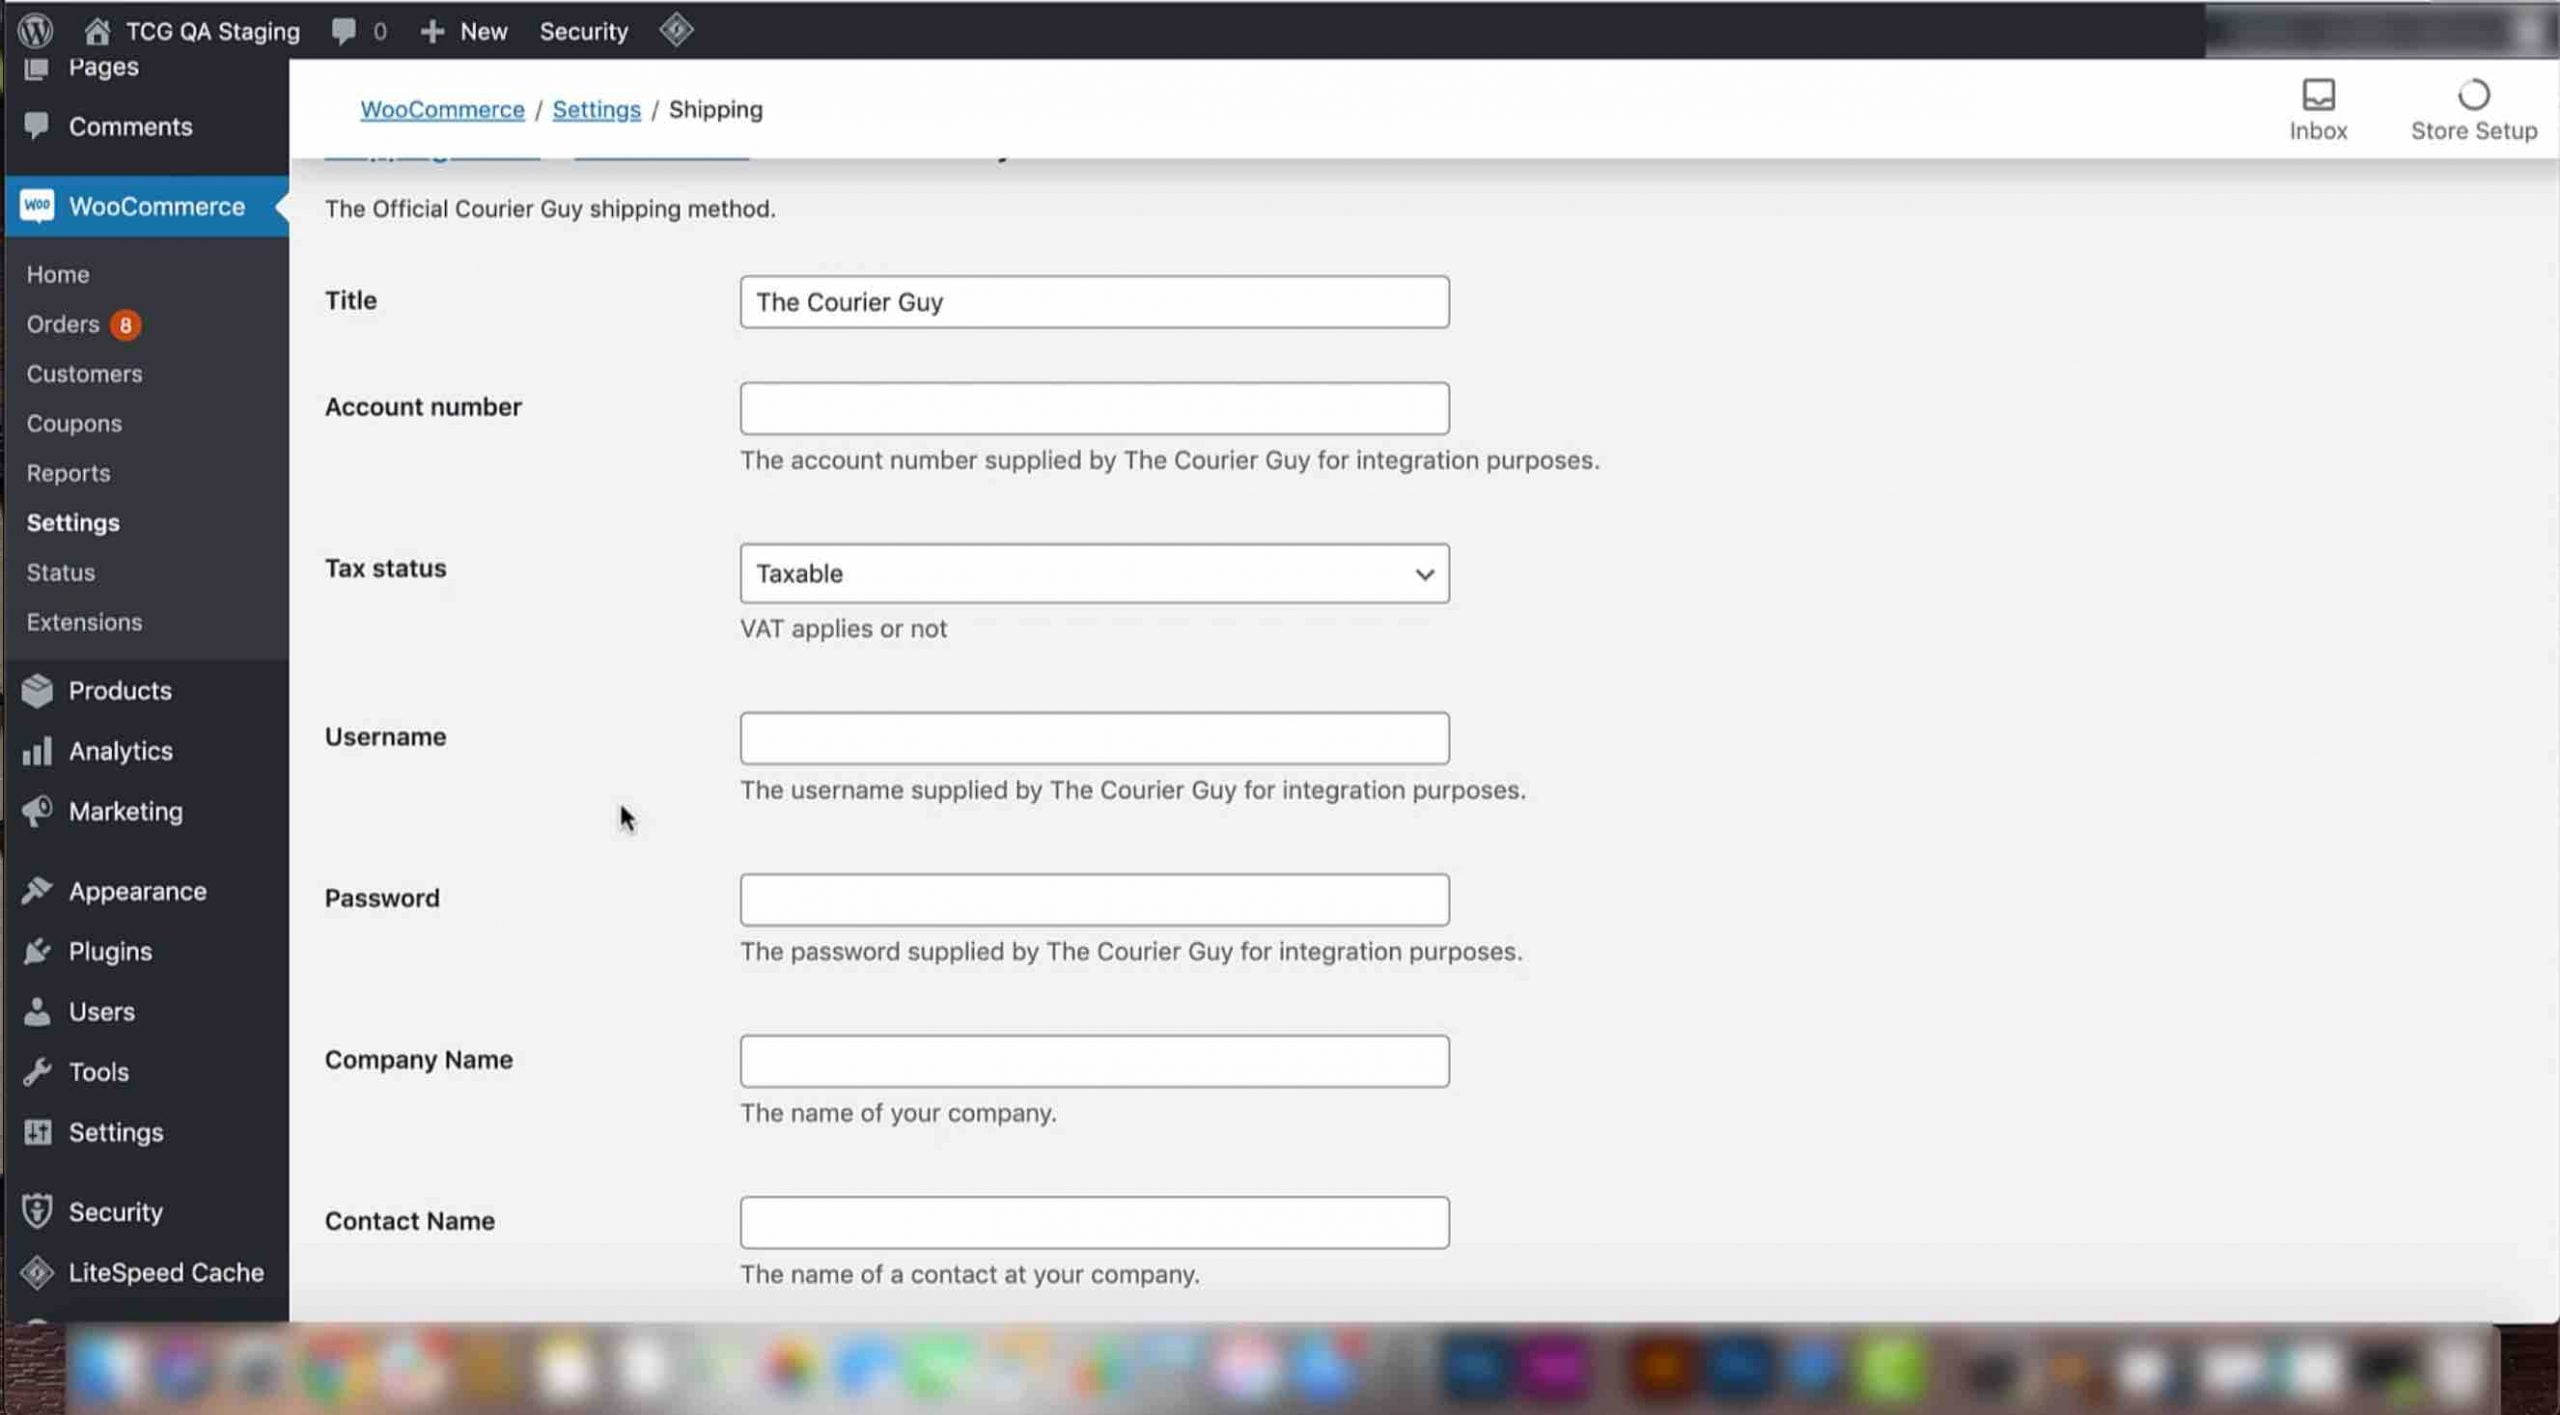
7) This will open a detailed view of your shipping method. First, add the account number given to you by The Courier Guy.
8) Then, add your username and password. Make sure to get these e-commerce login details from The Courier Guy, they will differ from the website login details for The Courier Guy portal. Once done, click save.
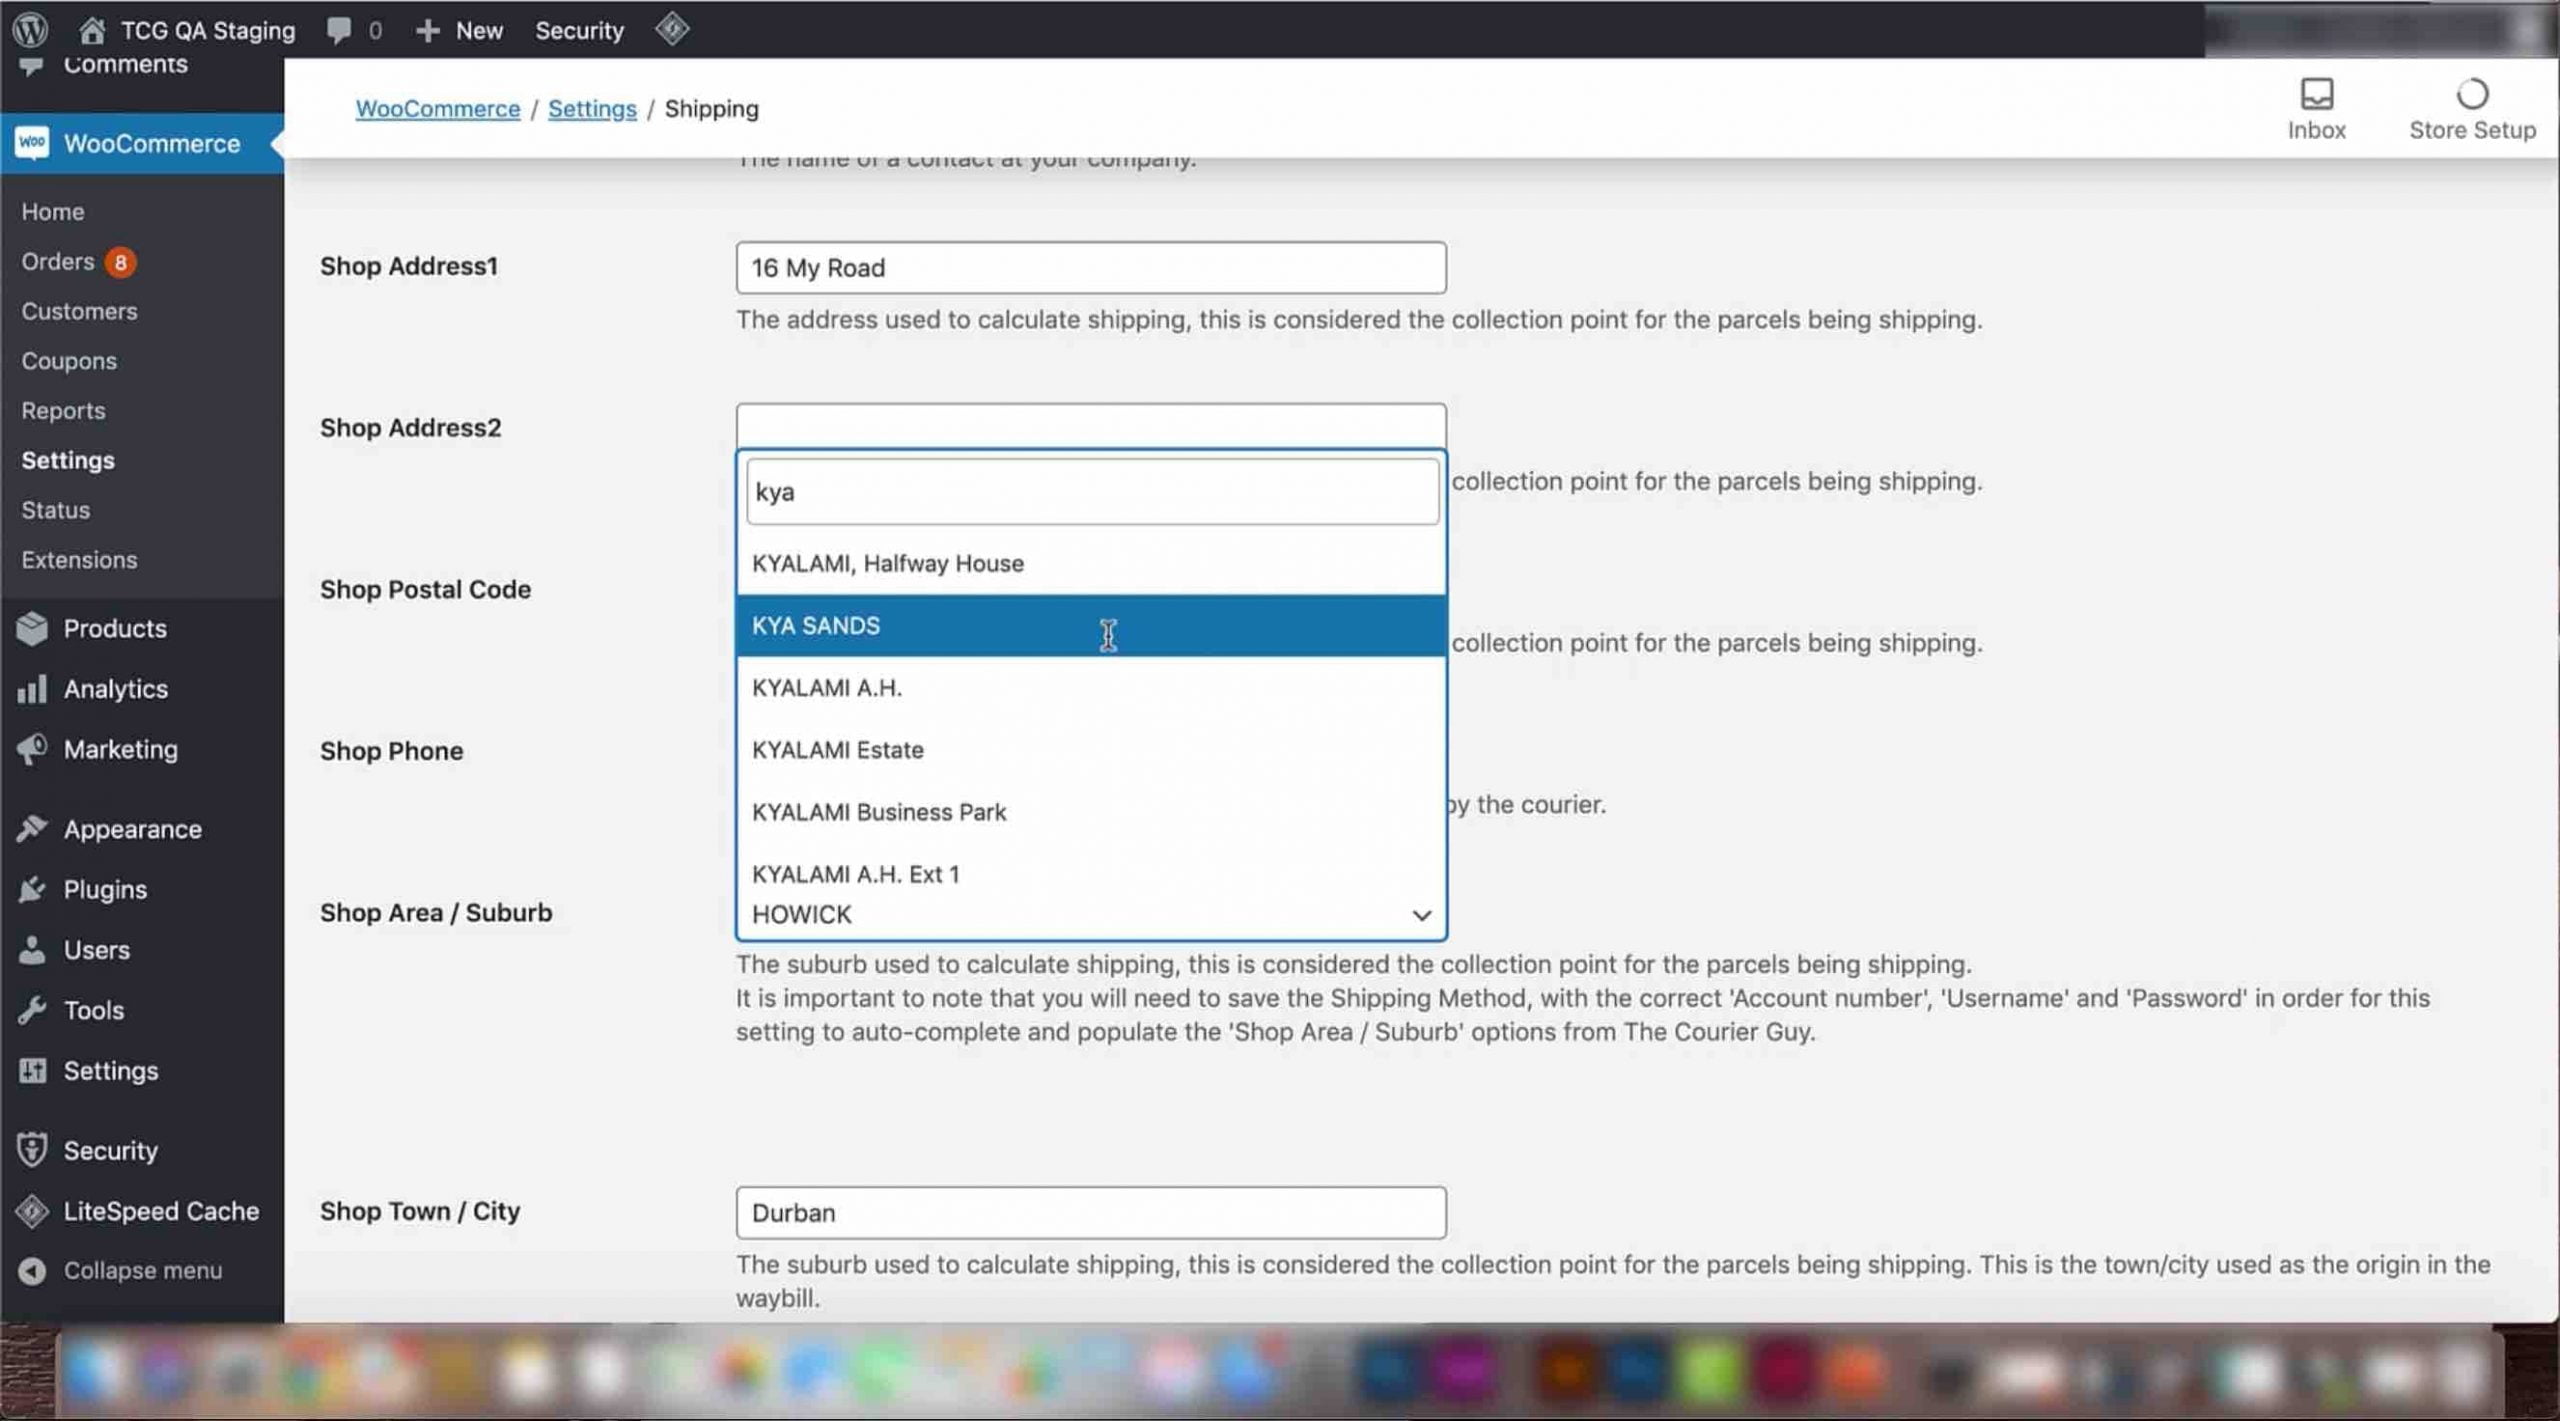
9) When your information has been saved, refresh this page, and type in your suburb in the ‘Shop area or suburb’ section. After a few seconds, a few options that match your search will display, and you will need to click on the correct suburb, and then click save again. All this information will now be saved on your website.


