In this video, we will show you which plugin for The Courier Guy you will need on your website. How to install it and how to activate it.
Screenshots
Video Transcript
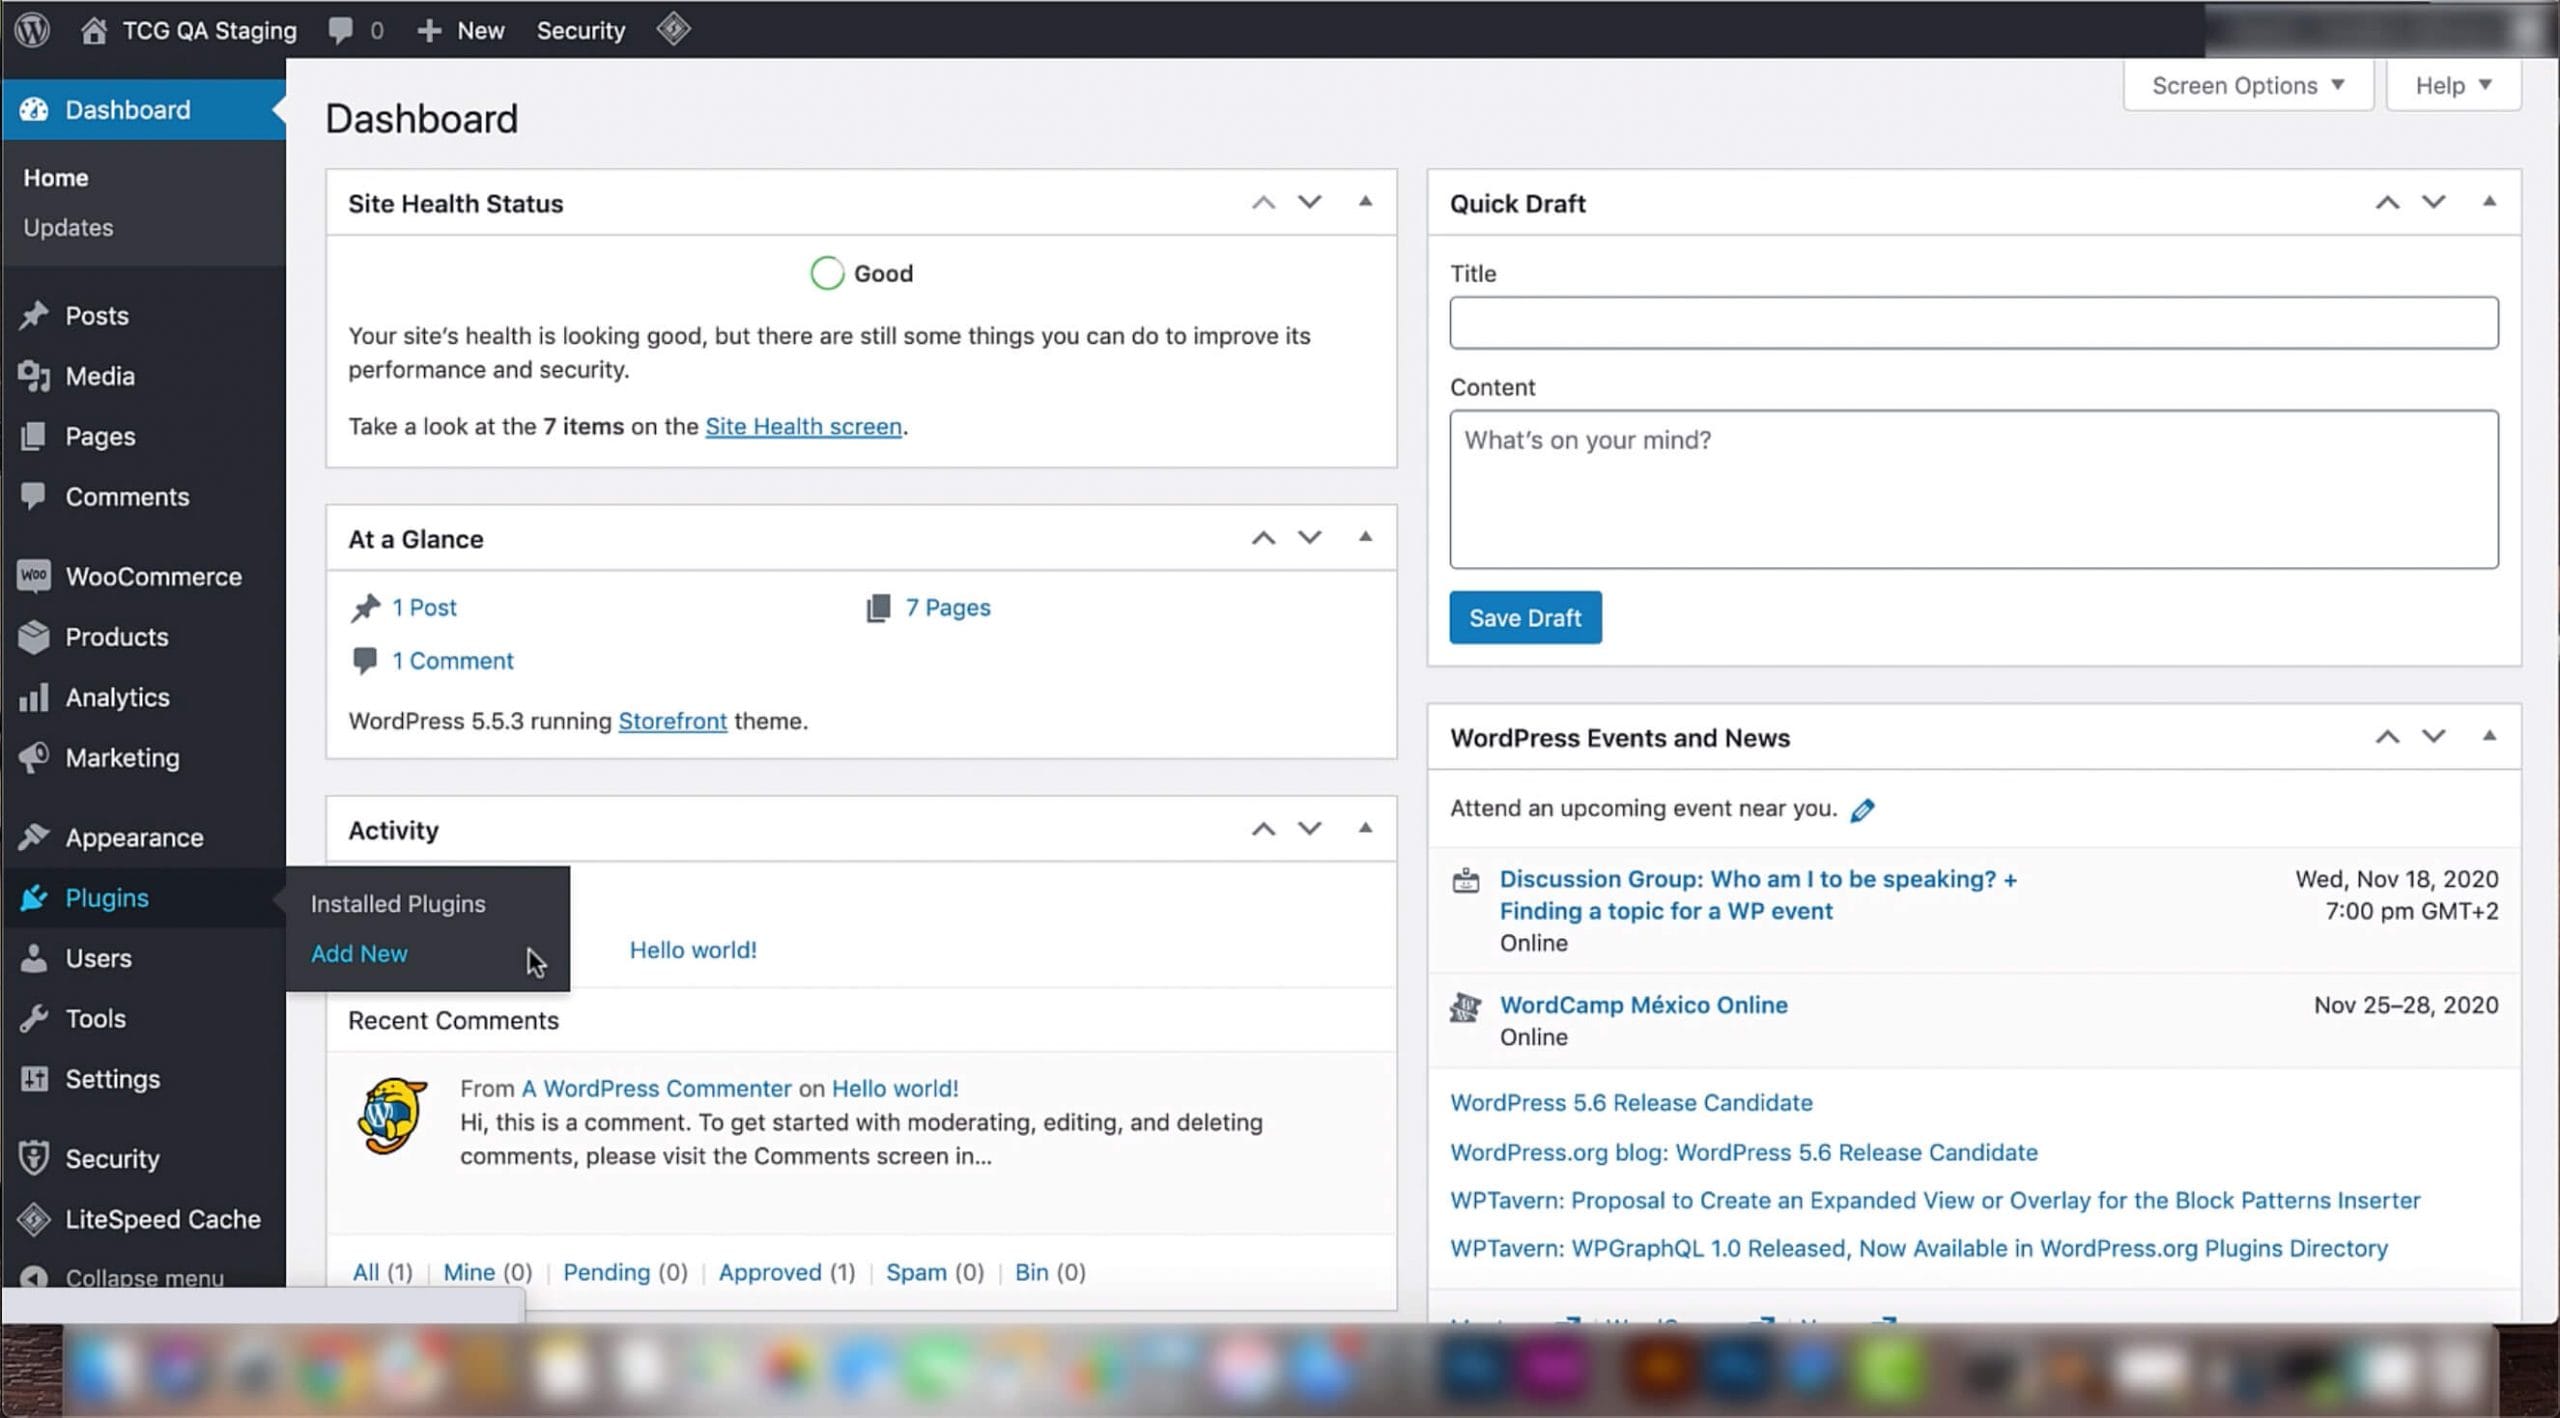
1) In your Dashboard, hover over the ‘Plugins’ option, in the bar on the left of your screen. Then click on the ‘Add new’ option that appears next to it.
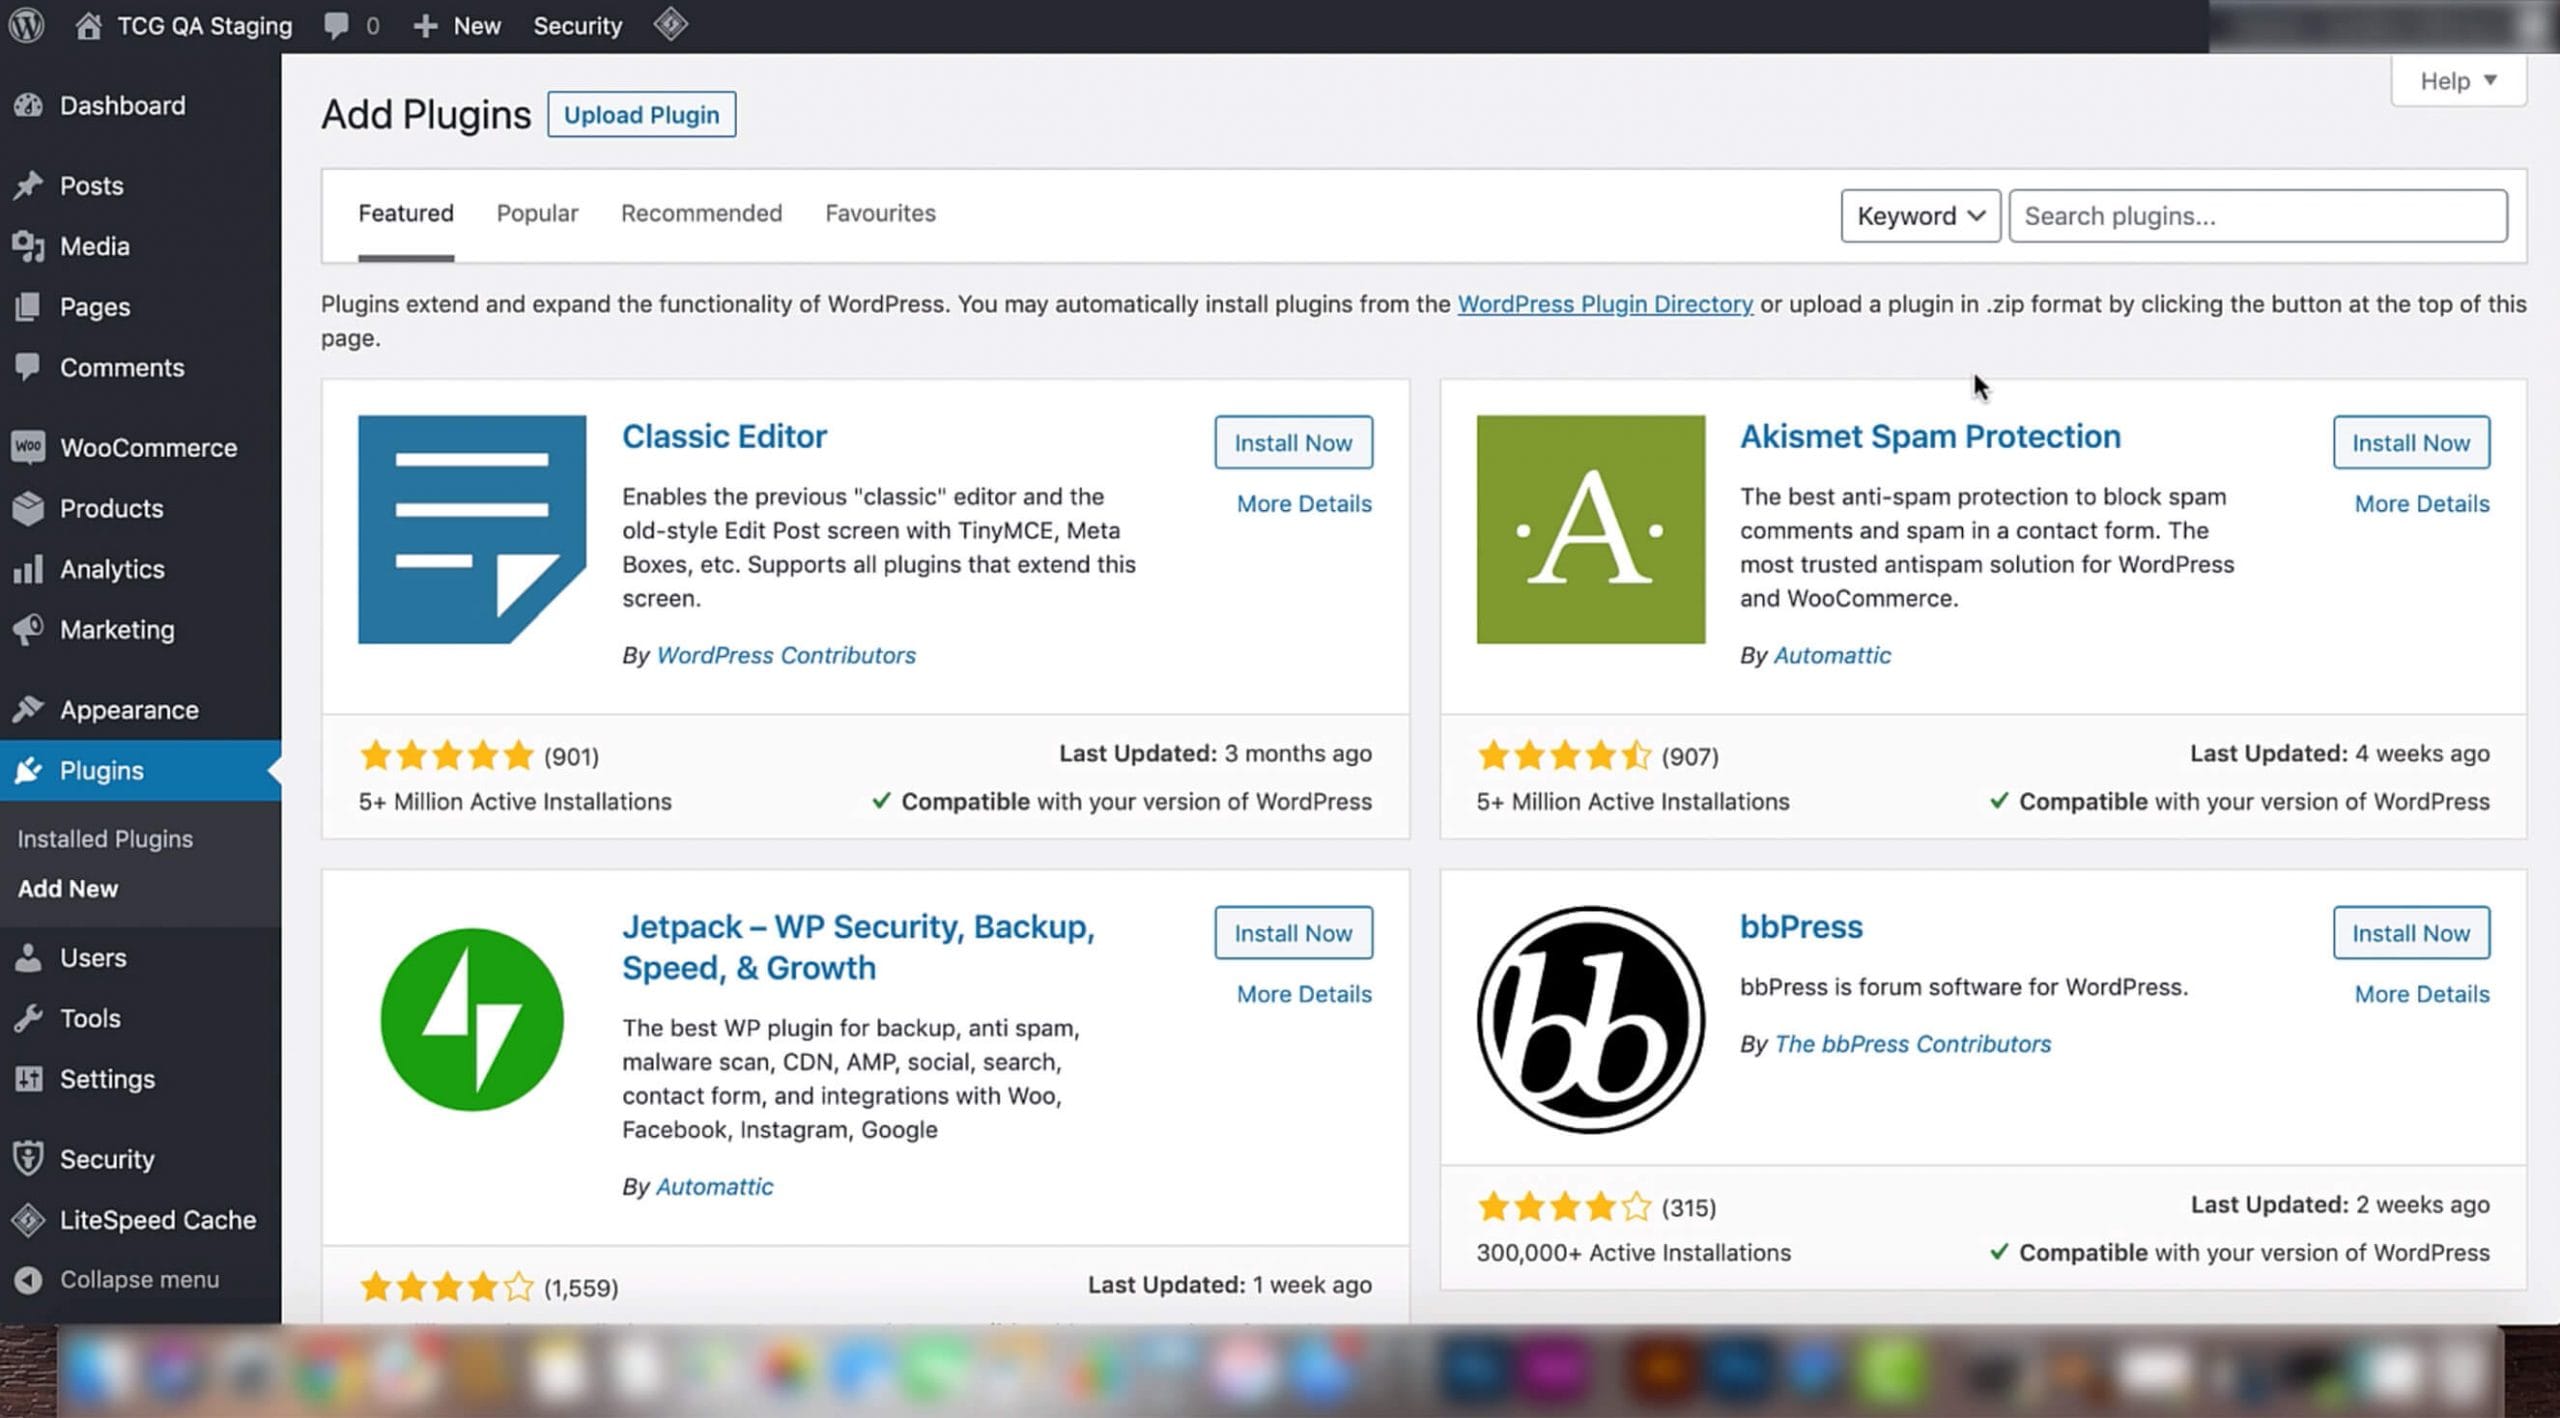
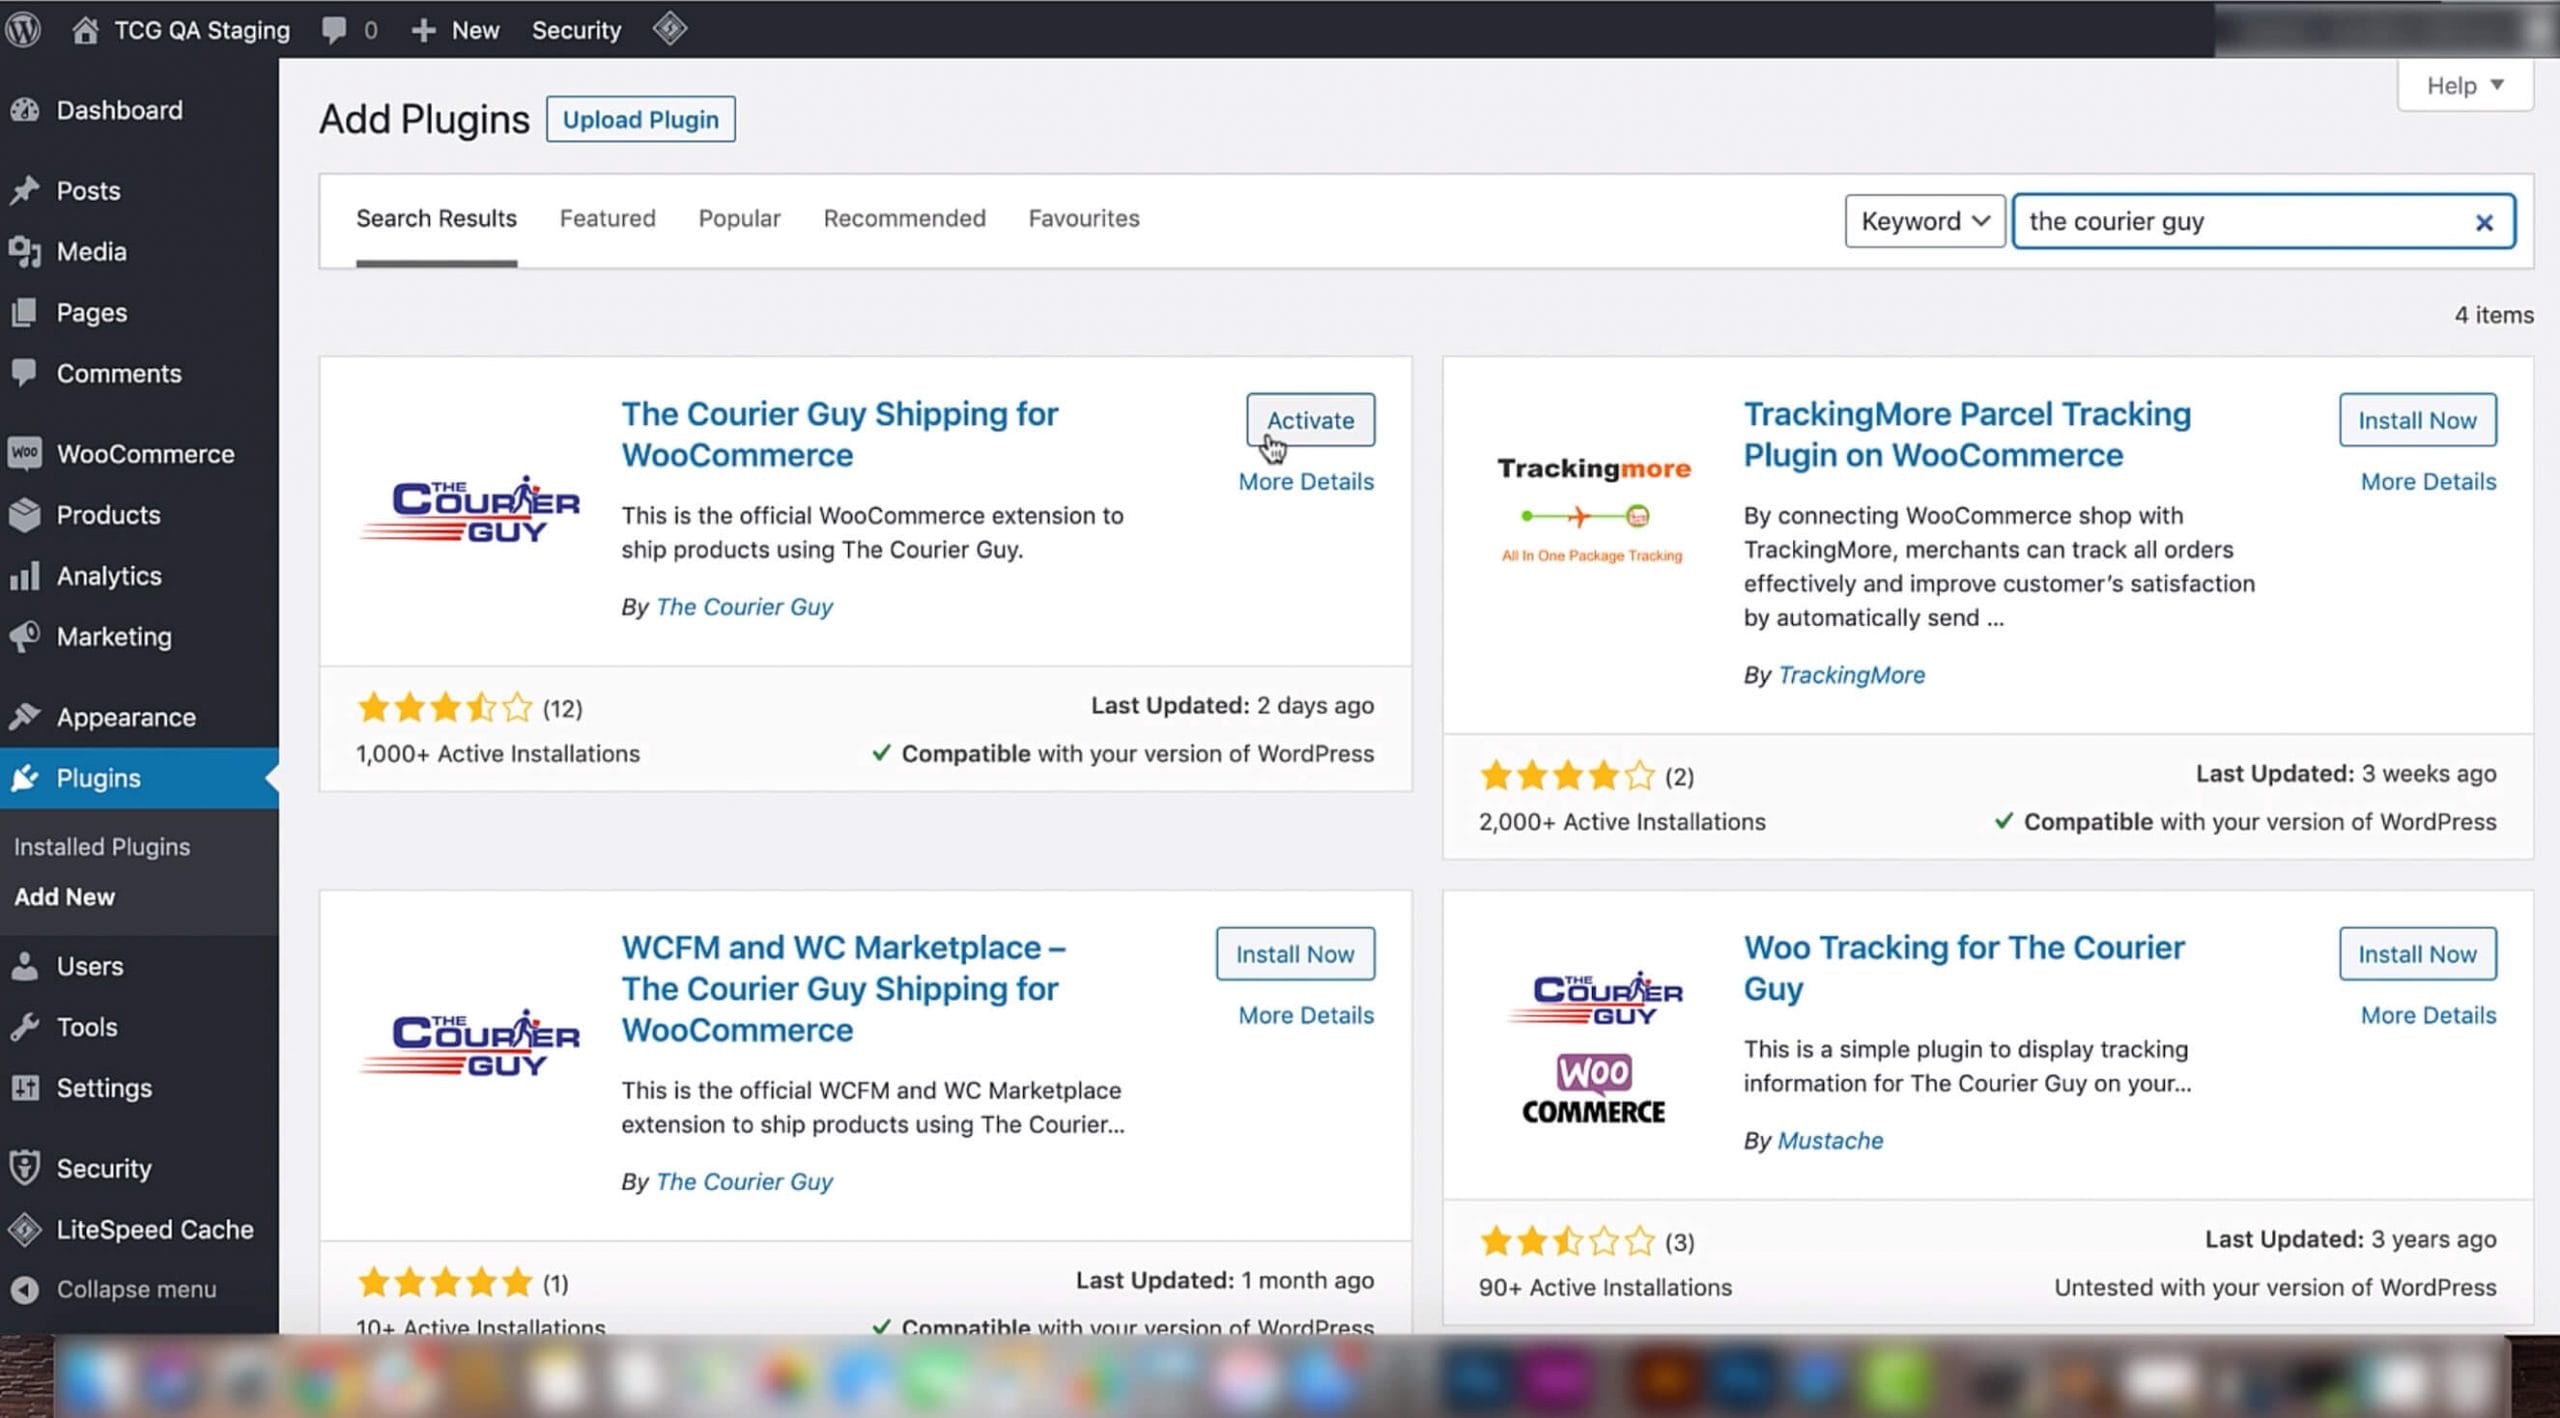
2) You will be redirected to the ‘Add Plugins’ page. Once here, look for the ‘Search plugins’ bar near the top of the screen.
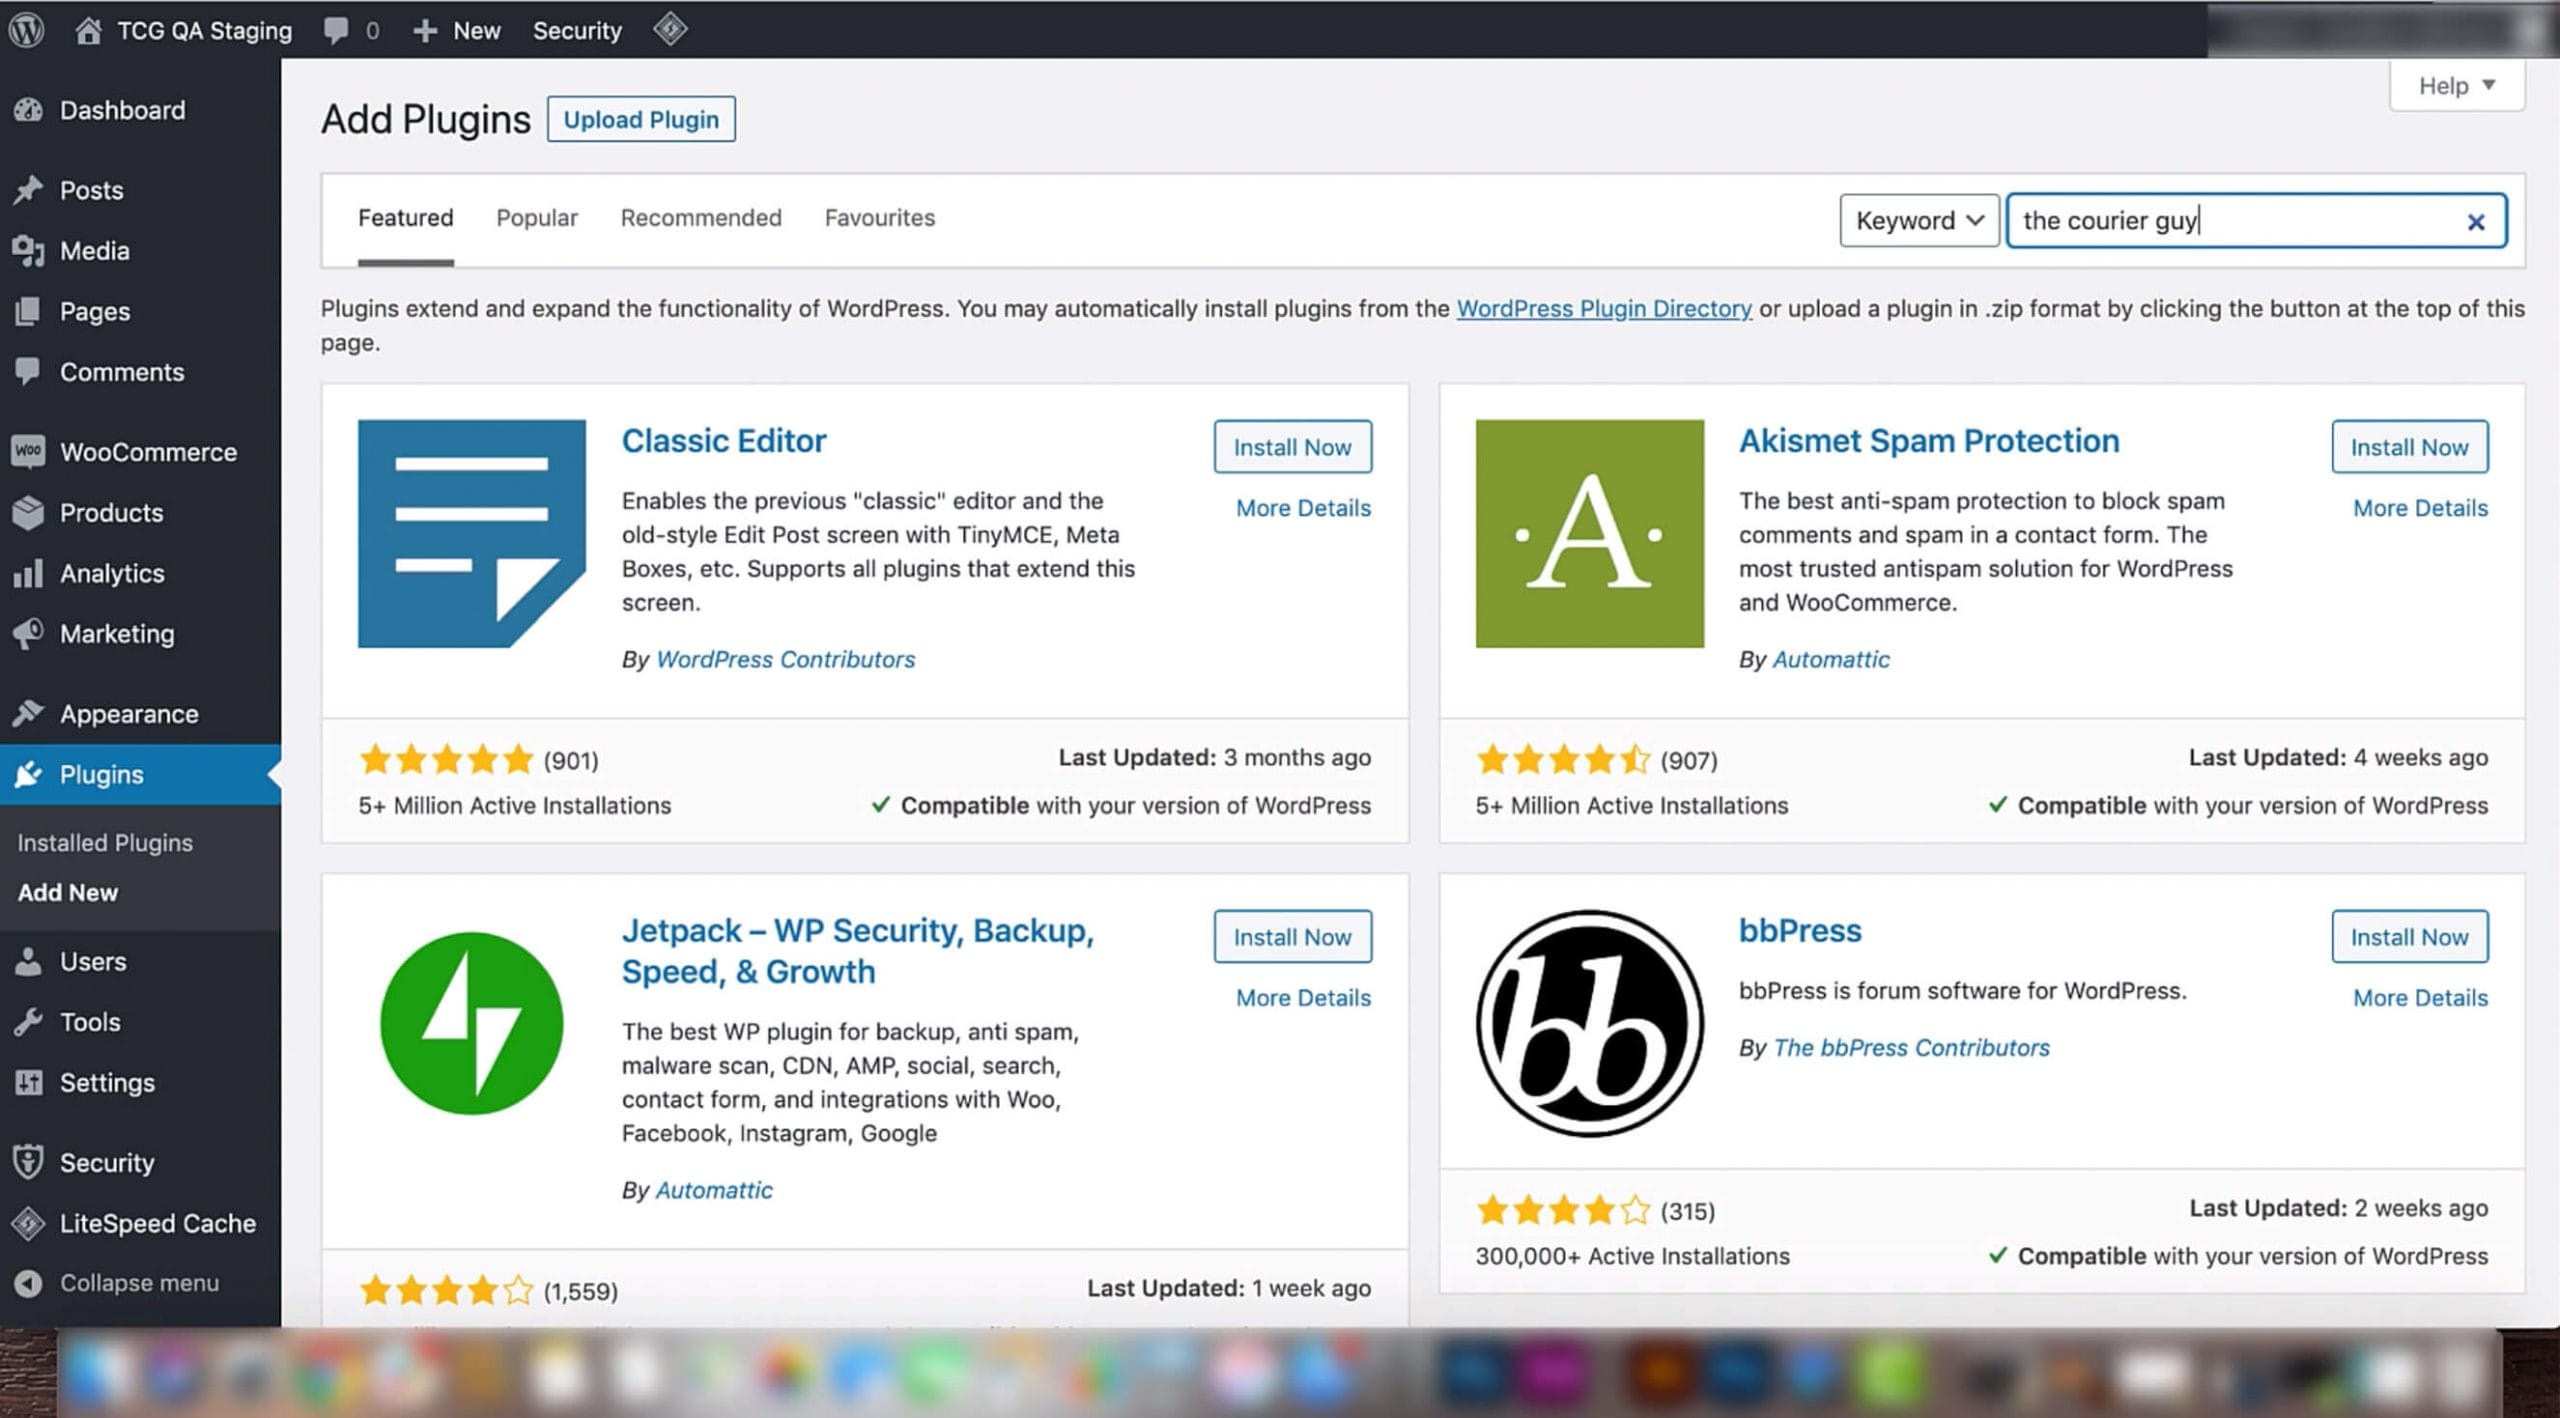
3) From here, you can find any plugin you are looking for. Type in ‘The Courier Guy’ into the search panel and click Enter.
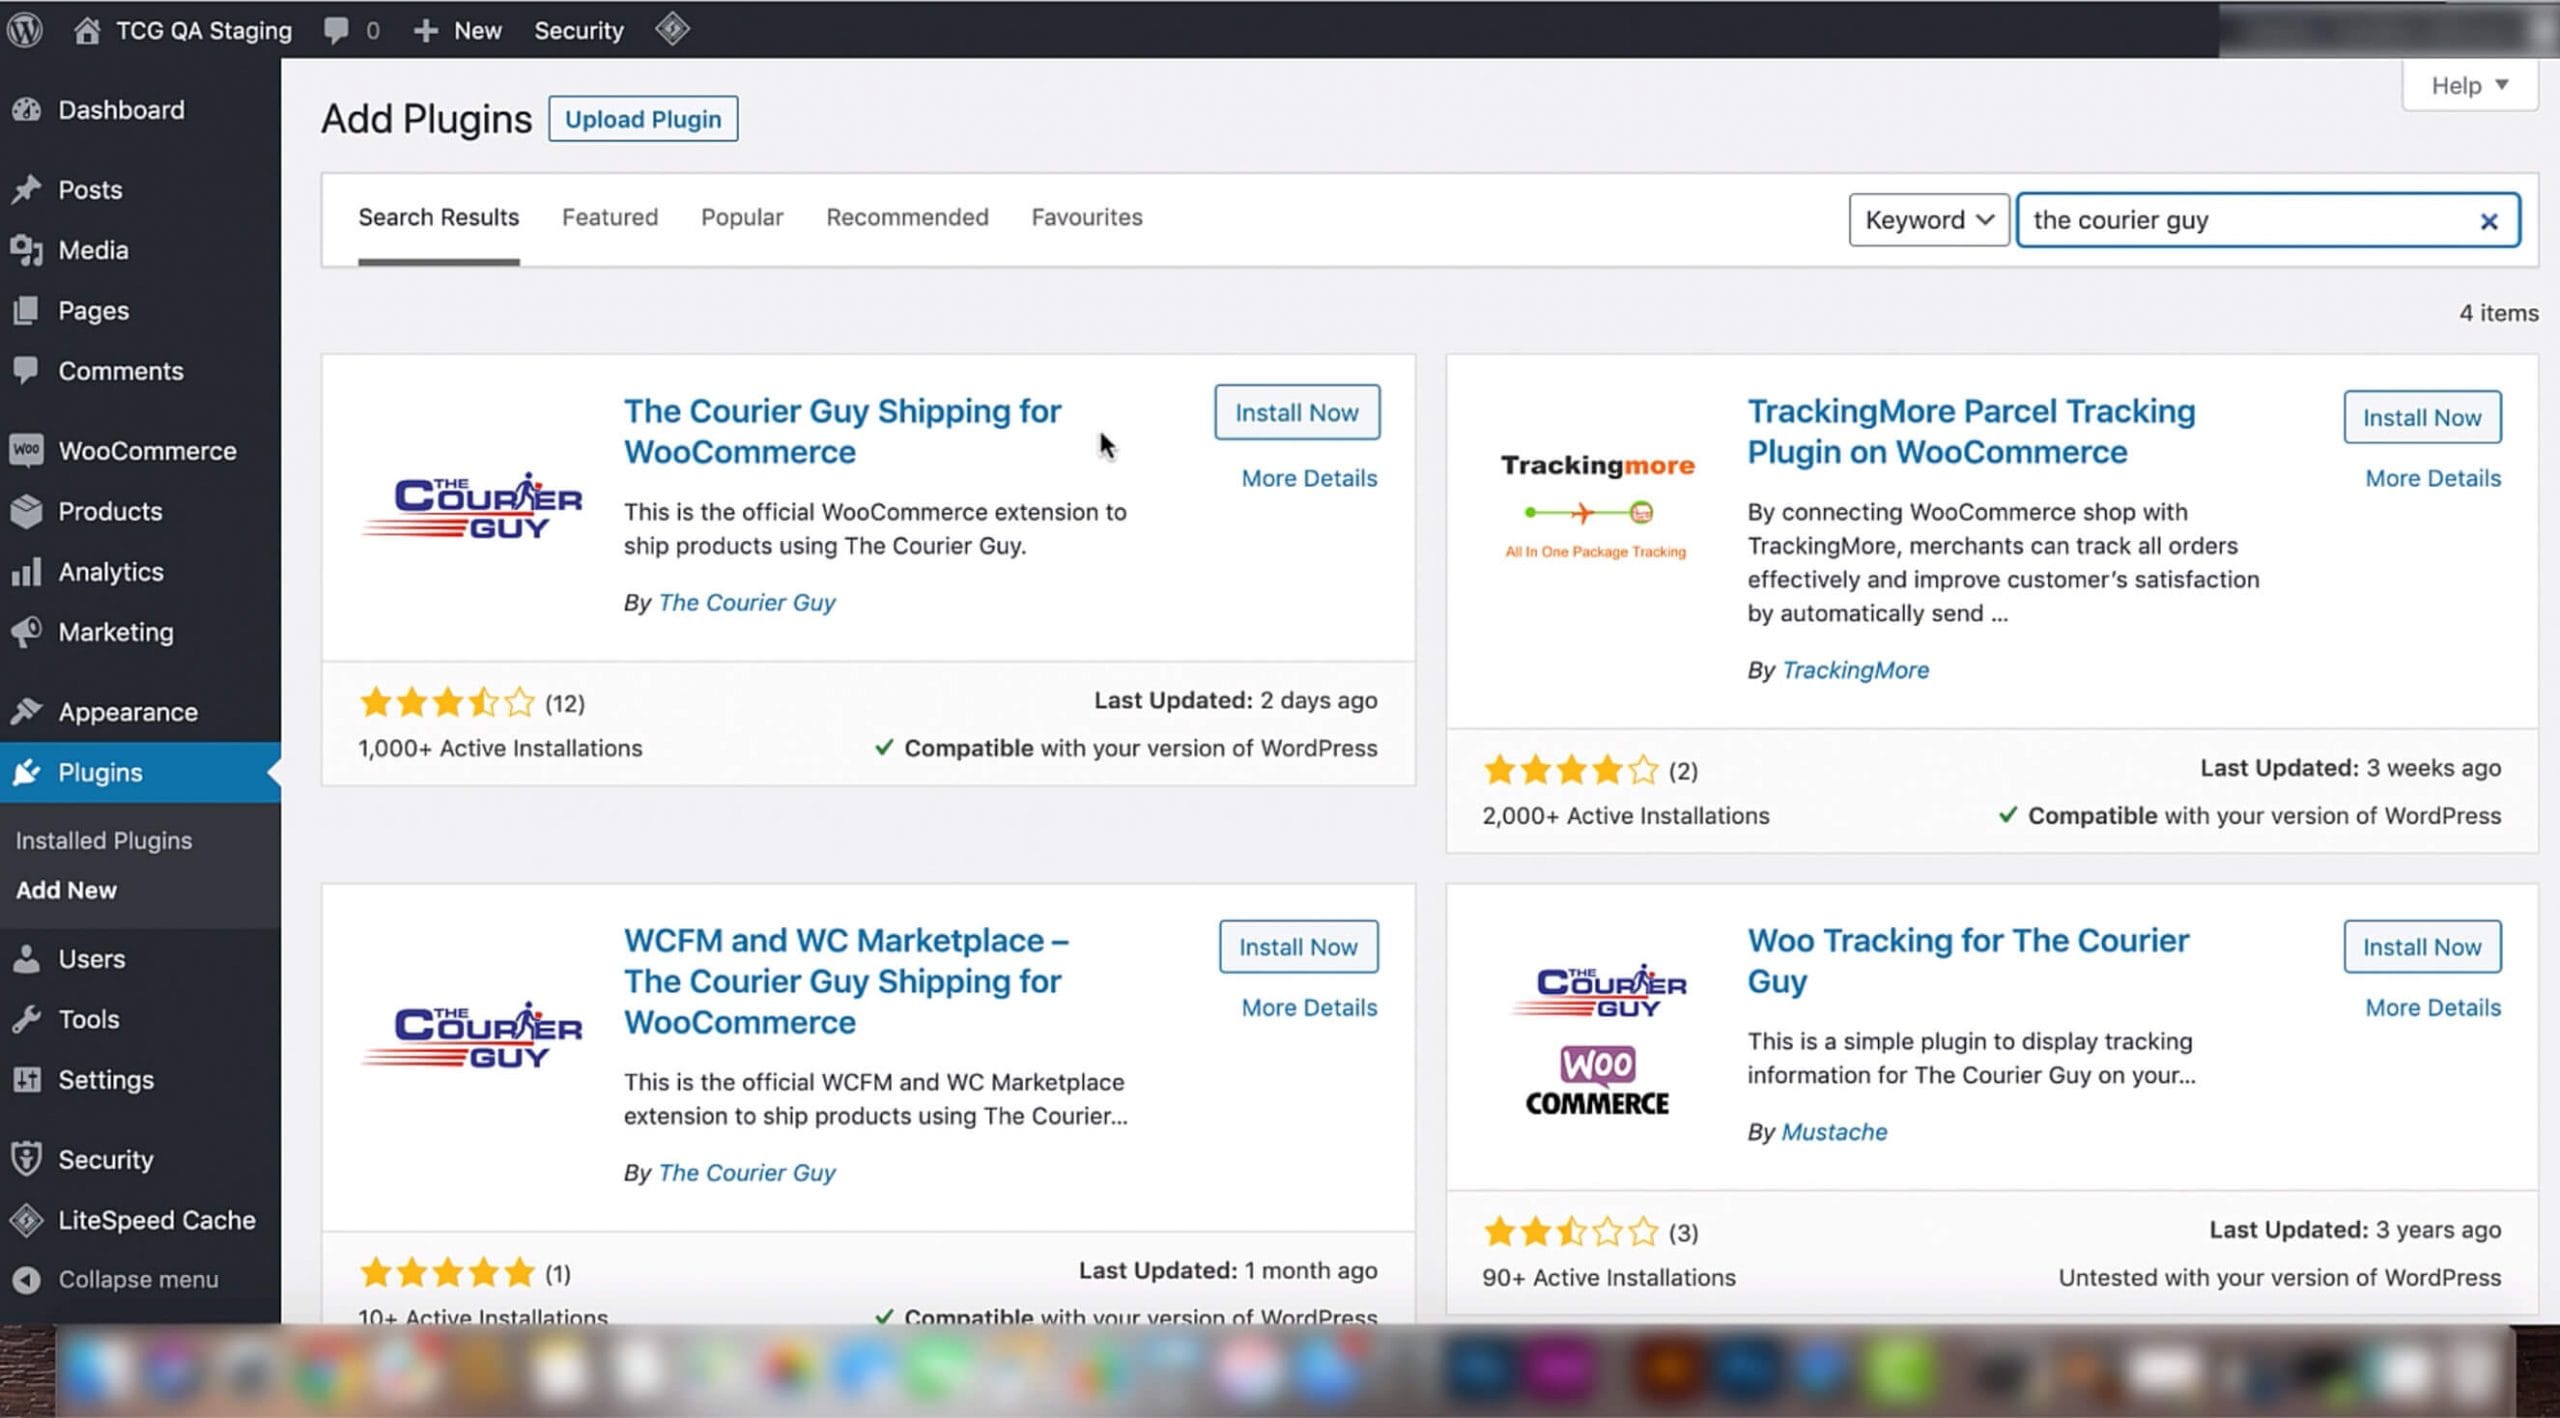
4) Look for the option called. ‘The Courier Guy Shipping for WooCommerce.’ Click on the ‘Install now’ button next to it.
5) Once the plugin has installed, the ‘Install now’ button will change to an ‘Activate’ button. Select the ‘Activate’ option.
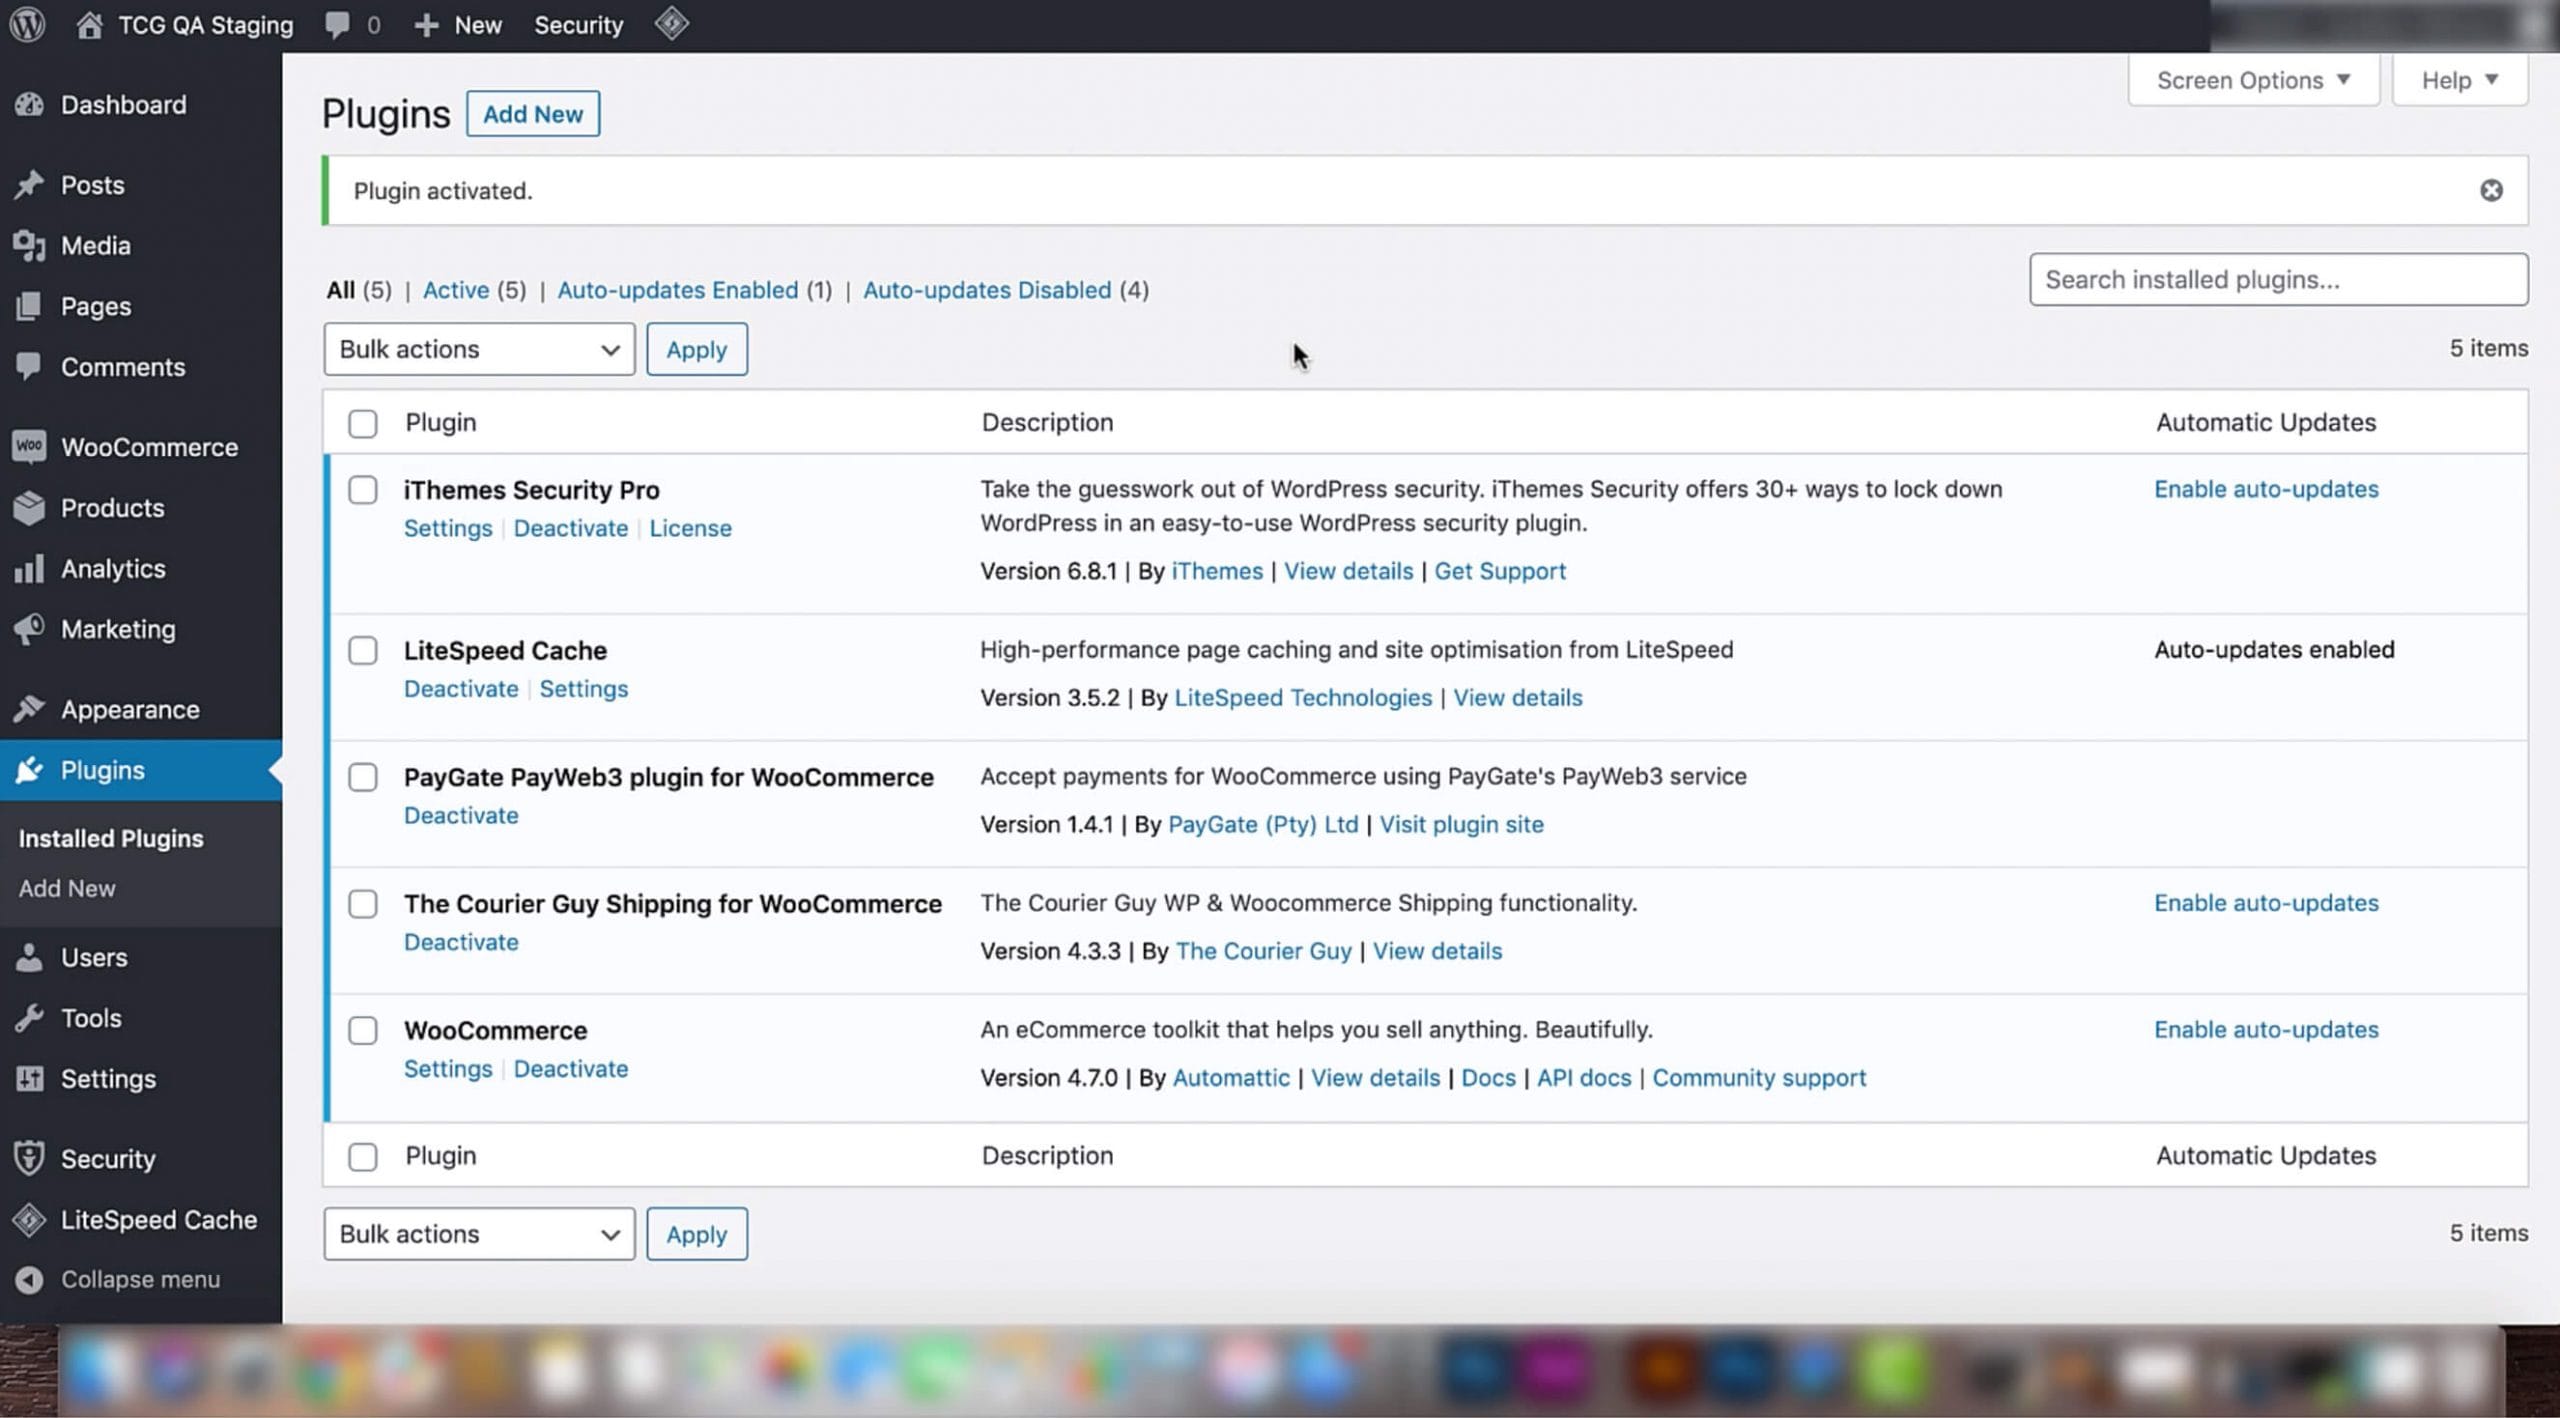
6) You will be redirected to a new page. A bar will appear at the top of the screen, that says ‘plugin activated’. Your plugin will now be active and ready to use.


